How to enable 2FA with SMS in Ozeki SMS Gateway
This article shows you how to enable two-factor authentication (2FA) in Ozeki SMS Gateway using a phone number, where the verification code is delivered as an SMS message. This method is a convenient choice for users who would rather receive a one-time code on their mobile phone than install a separate authenticator app. The guide first shows you how to set up a mobile network connection, since this is required for the system to be able to deliver the verification code, then walks you through enabling phone number based 2FA and logging in with it.
What is two-factor authentication?
Two-factor authentication (2FA) is a security method that requires users to provide two different forms of identification before they can access an account. In Ozeki SMS Gateway, 2FA combines your regular login credentials with a temporary 6-digit code delivered as an SMS message to your mobile phone. This means that even if someone obtains your password, they will not be able to log in without also having access to that phone.
Steps to follow
We assume Ozeki SMS Gateway is already installed on your system. You will also need a mobile network connection to able to send SMS messages, you can check out our guides here: Connect your SMS Gateway to the mobile network.
- Set up a connection for sending SMS messages
- Enable phone number based 2FA
- Log in using phone number verification
Set up a connection for sending SMS messages
The following video shows how to set up an SMPP connection for sending SMS messages.
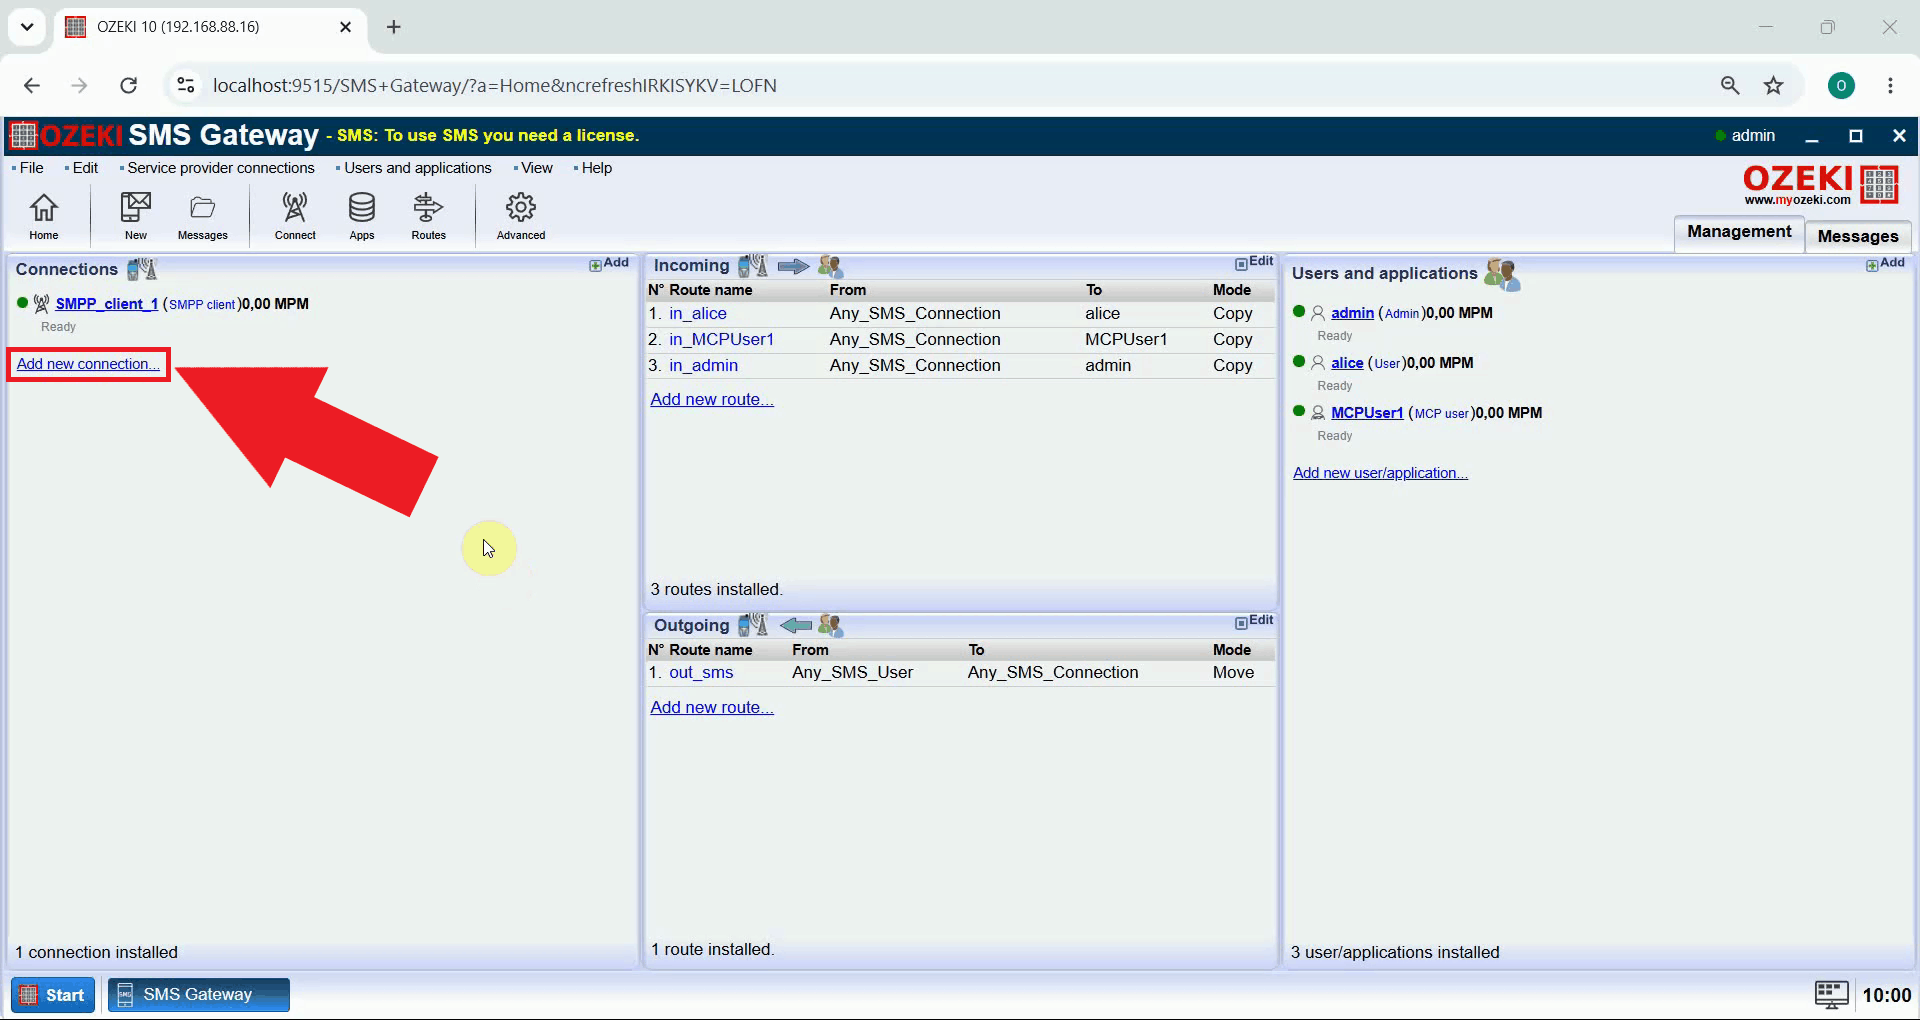
Open Ozeki SMS Gateway and click Add new connection... in the Connections panel (Figure 1).
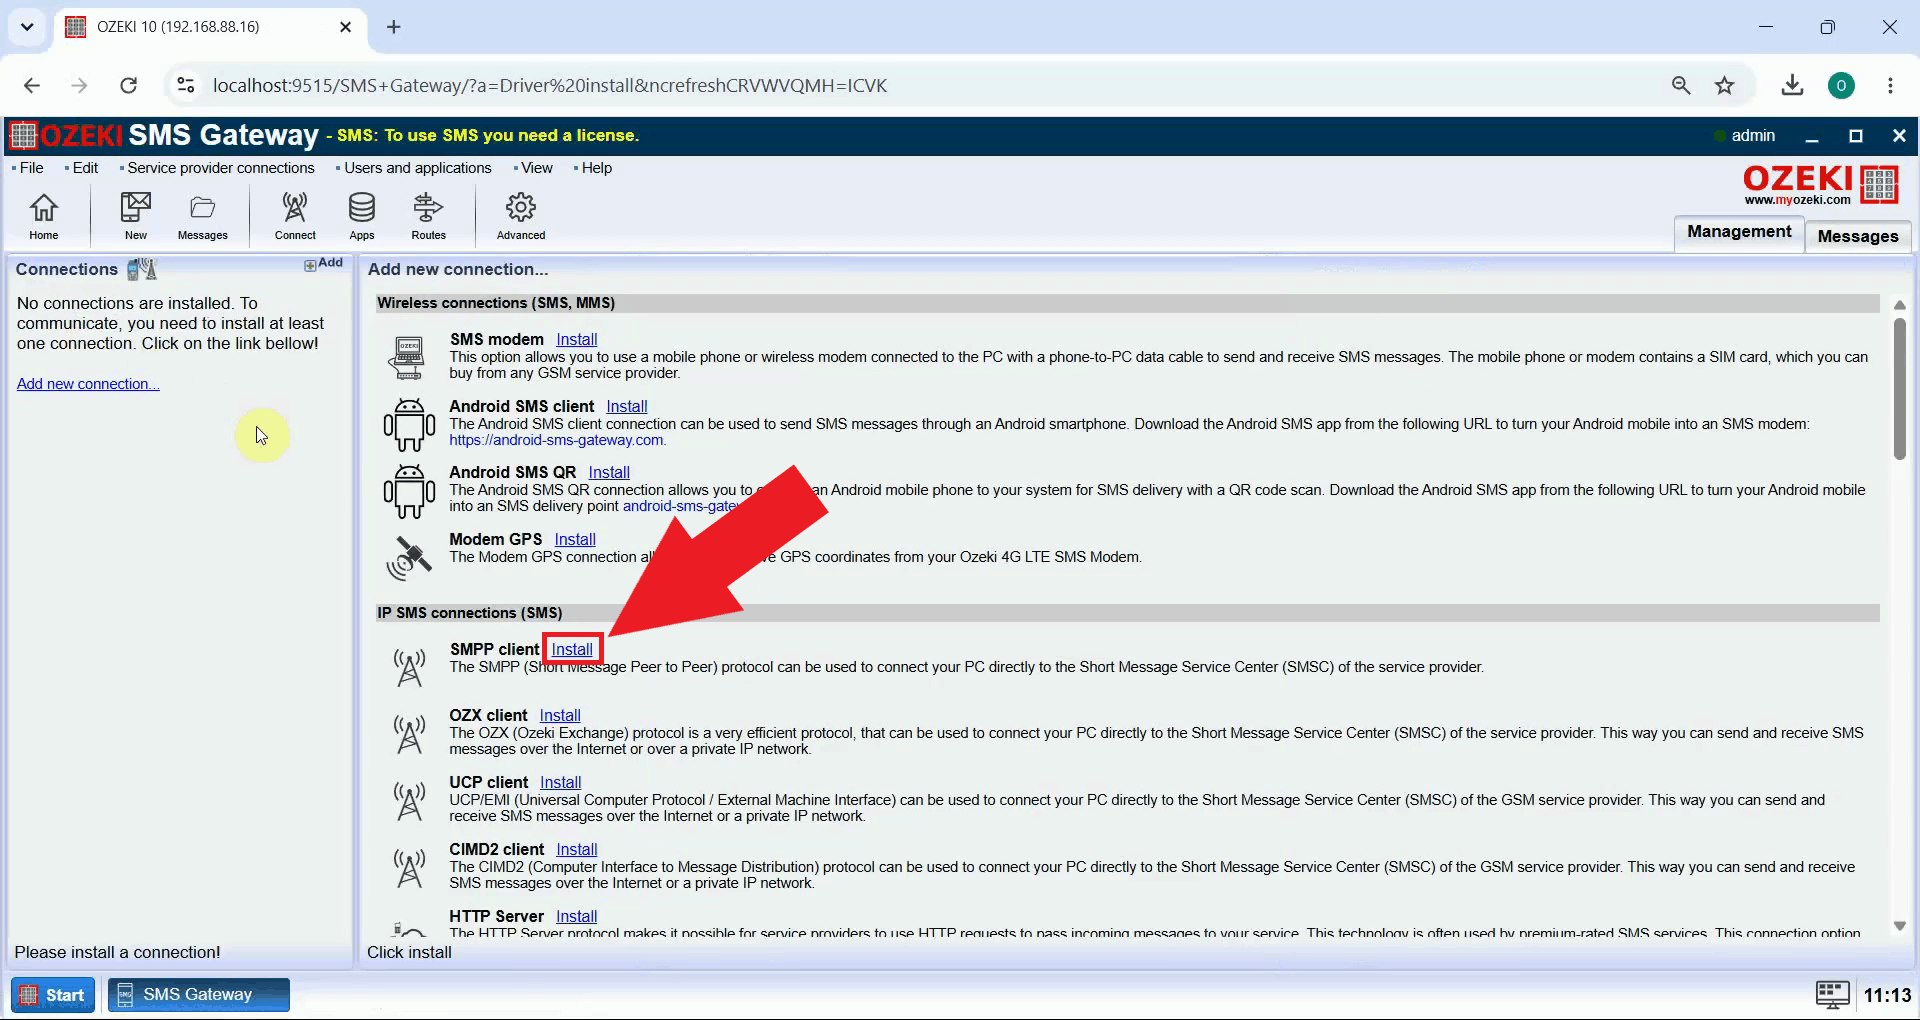
Click Install next to the SMPP client to add this type of connection (Figure 2). The SMPP client is shown here as an example, but Ozeki SMS Gateway also supports several other ways of sending SMS messages, including an SMS modem, an Android SMS client, OZX client, UCP client and CIMD2 client, so you can pick the one that best fits your existing setup.
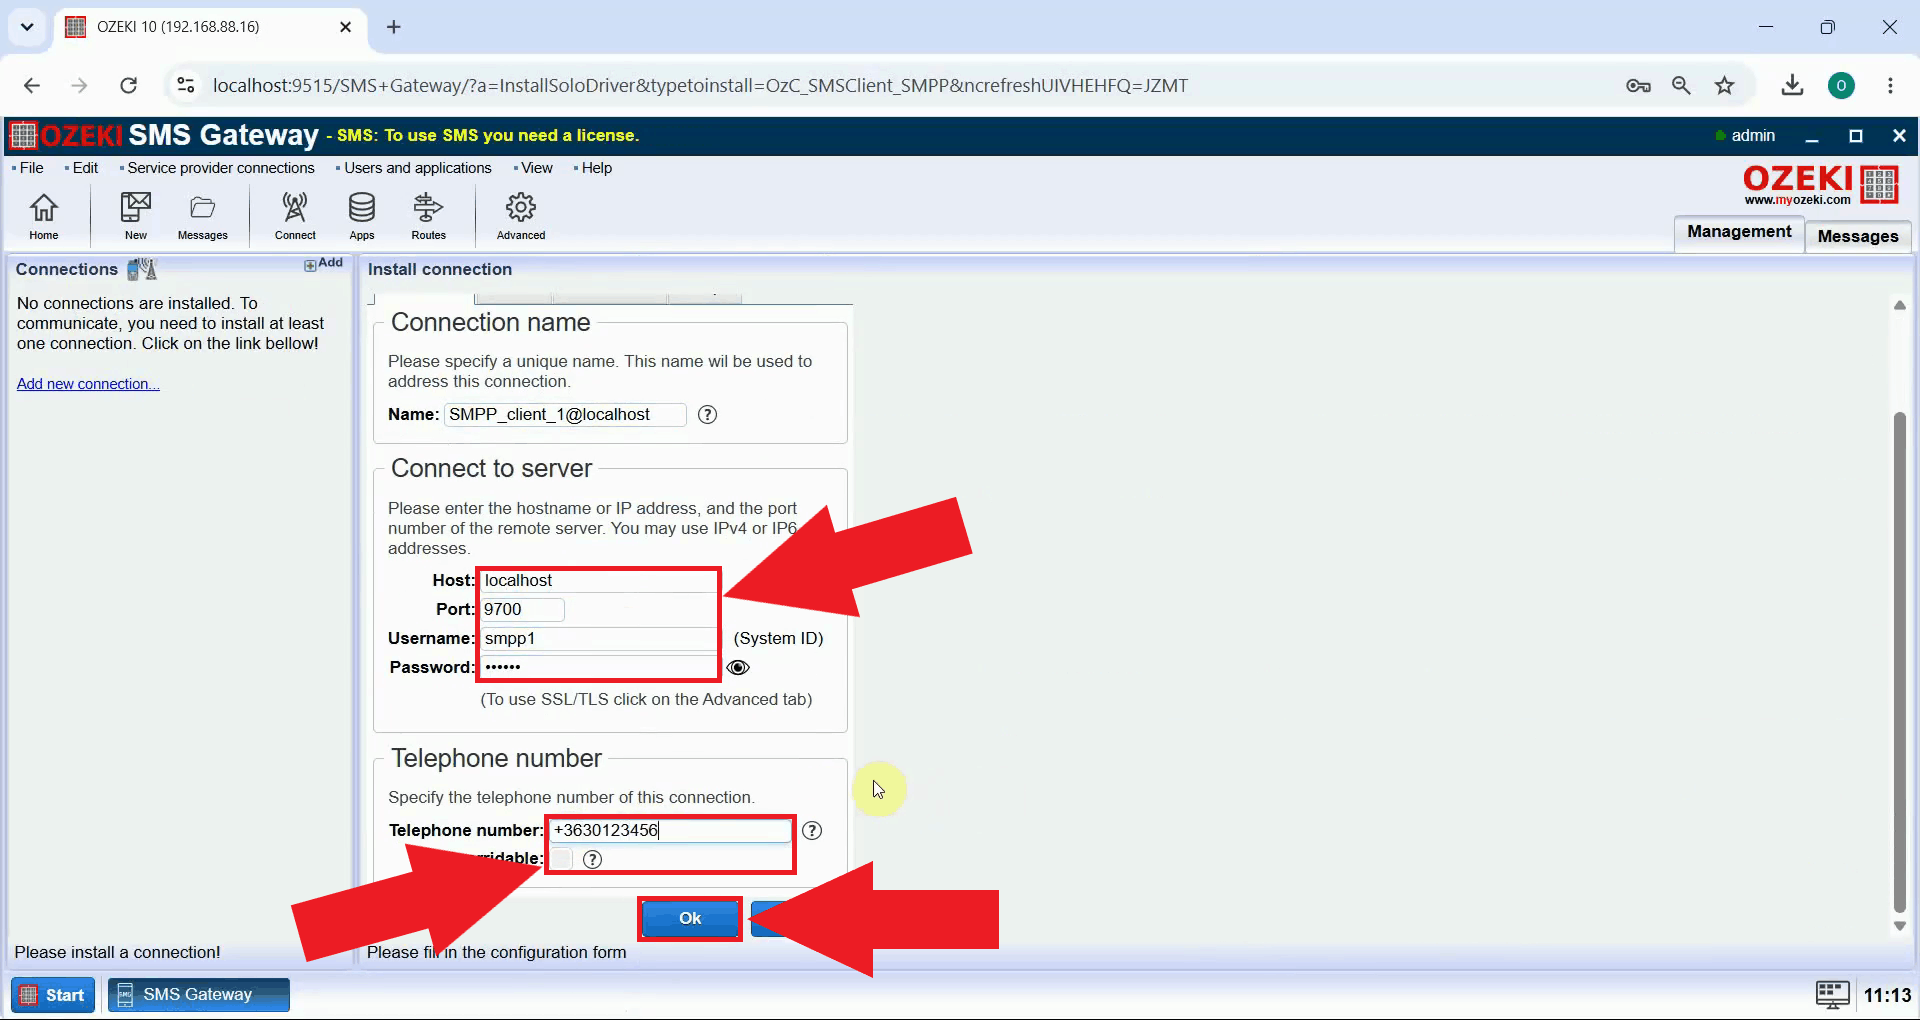
Fill in the connection name, the host, port, username and password provided by your SMPP service provider, then enter the telephone number associated with this connection and press Ok (Figure 3).
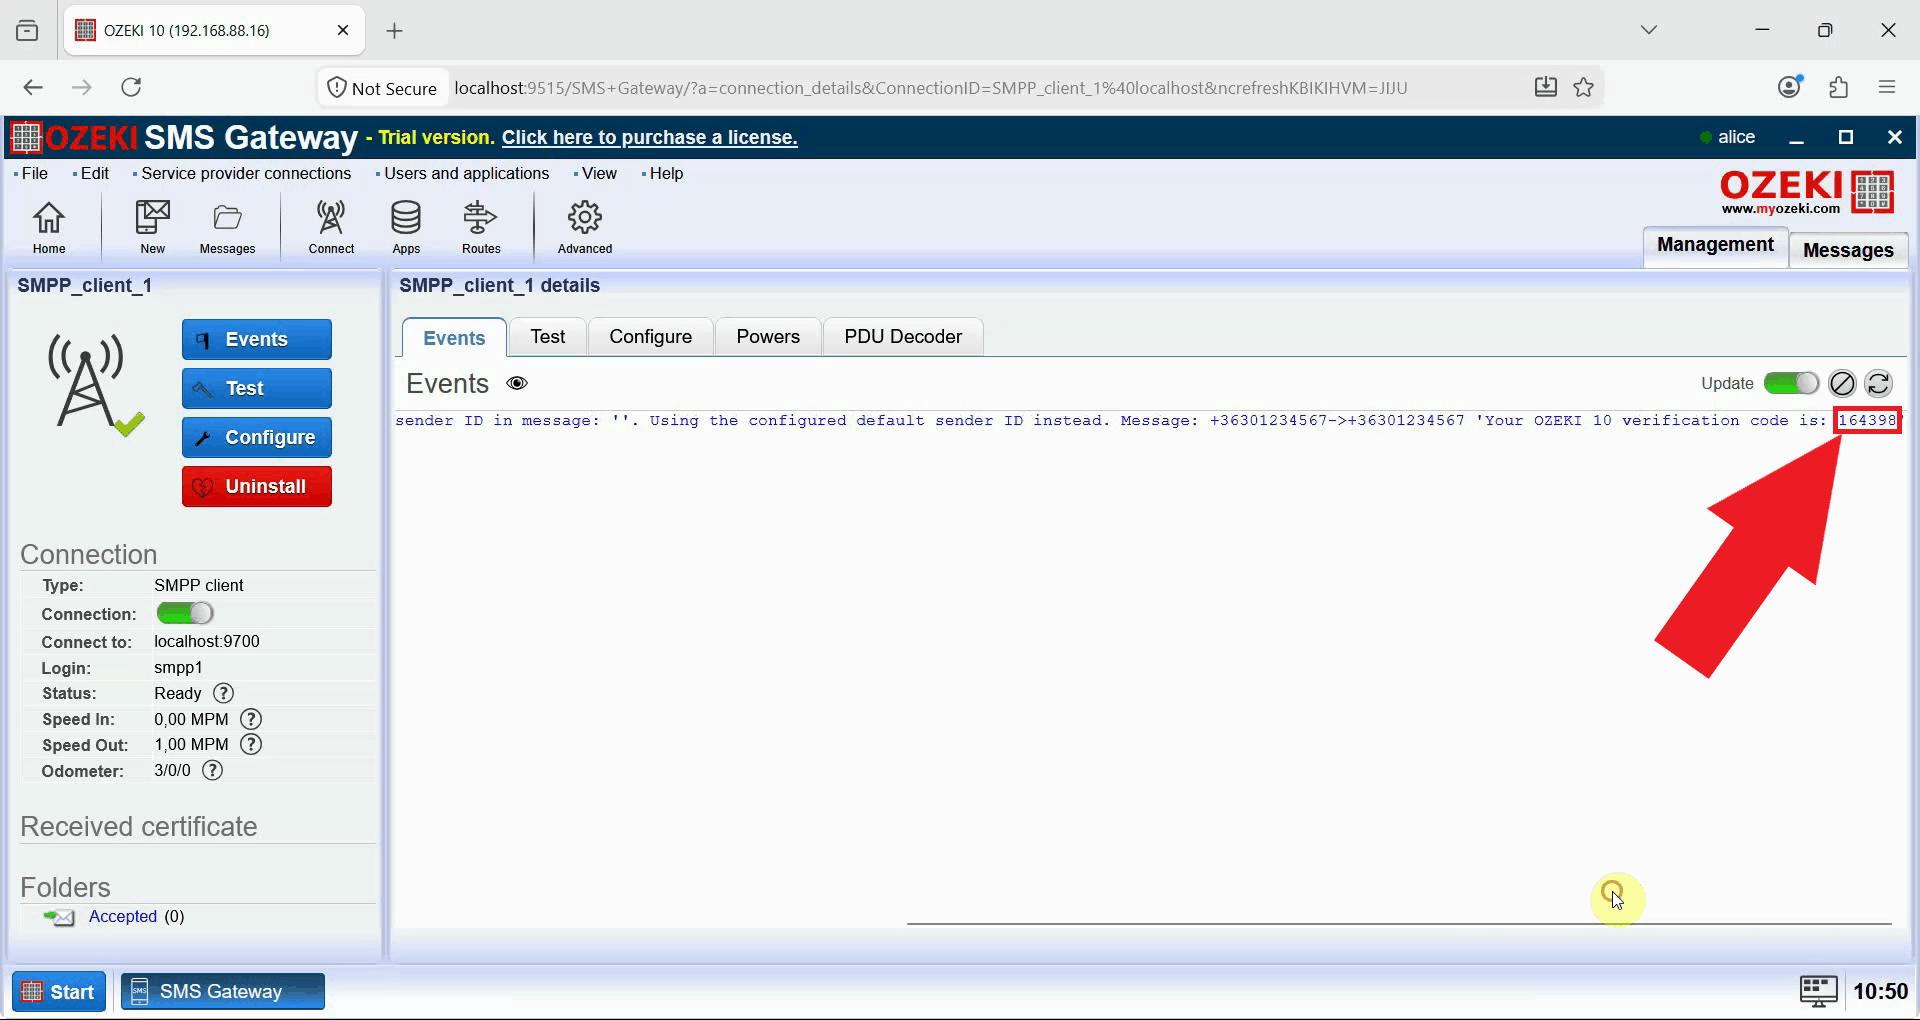
Toggle the Connection switch to turn the SMPP client on, then check the Events log to confirm that the connection is online (Figure 4). The connection's Status should read "Ready" once it has successfully established.

Enable phone number based 2FA
The following video shows how to enable two-factor authentication using a phone number.
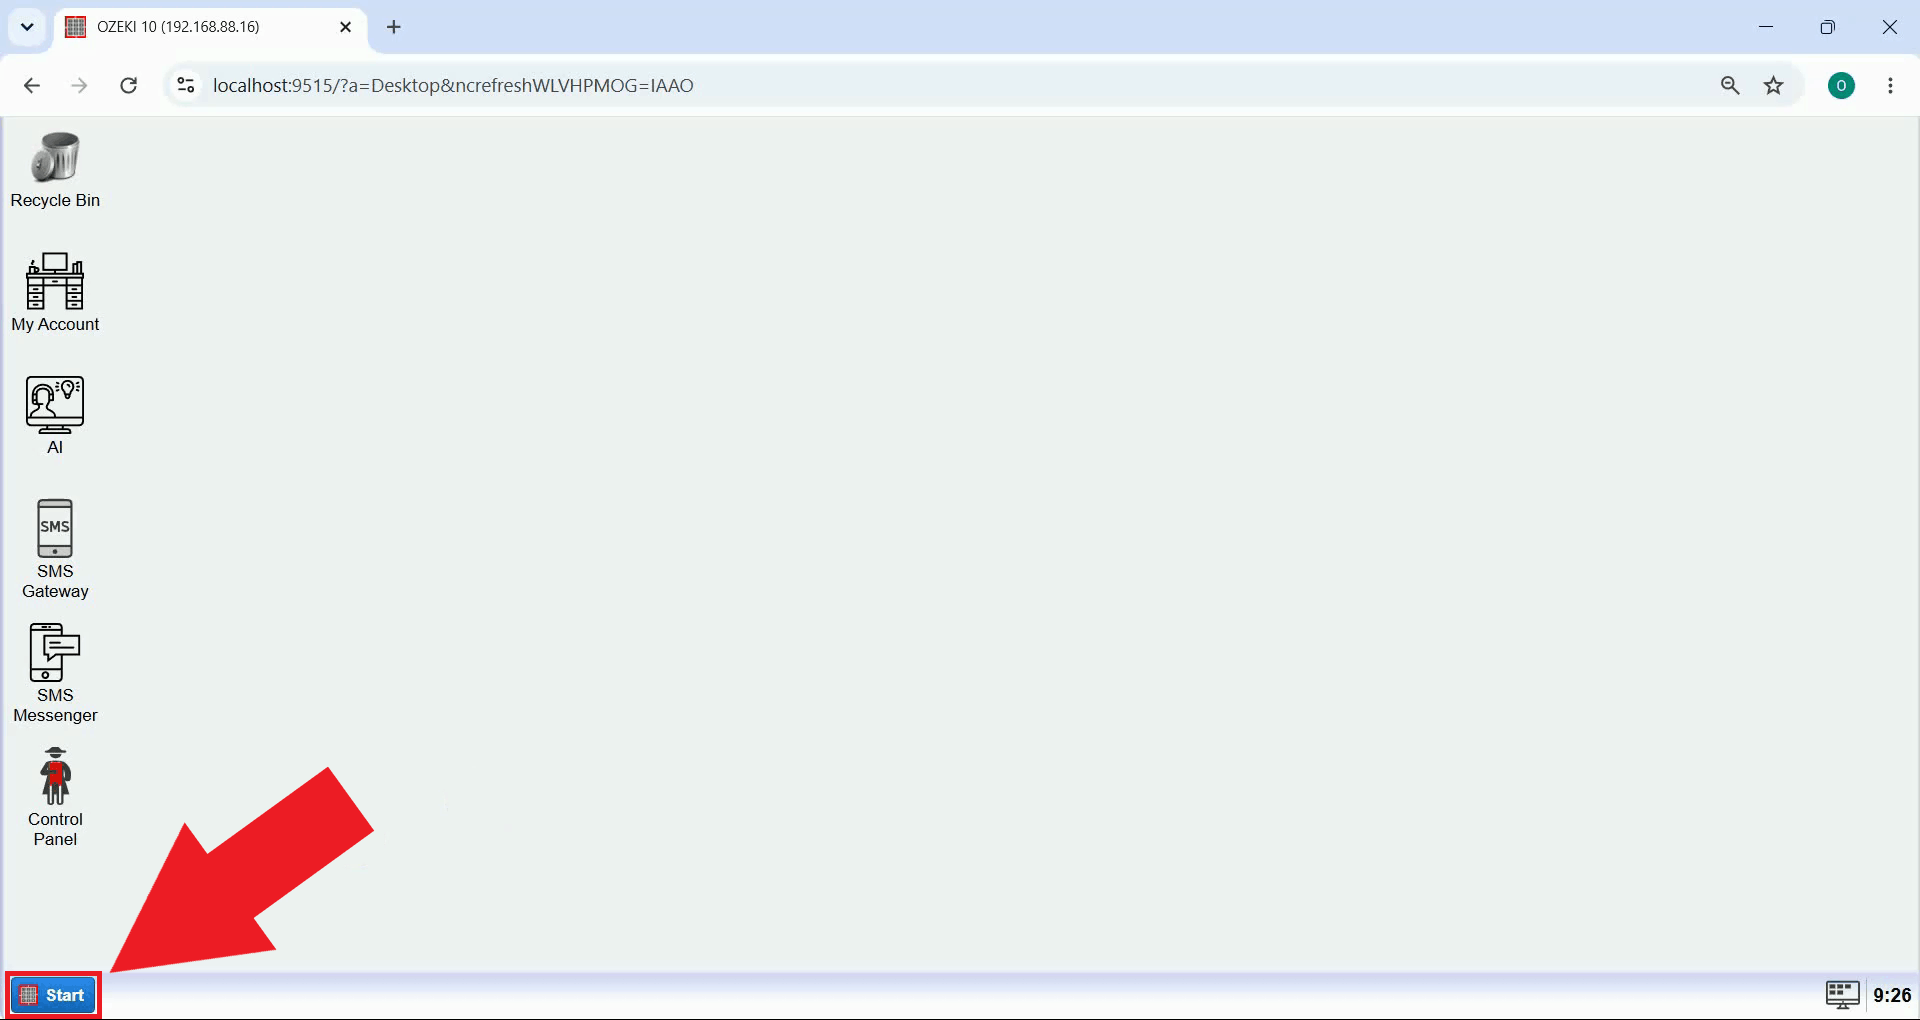
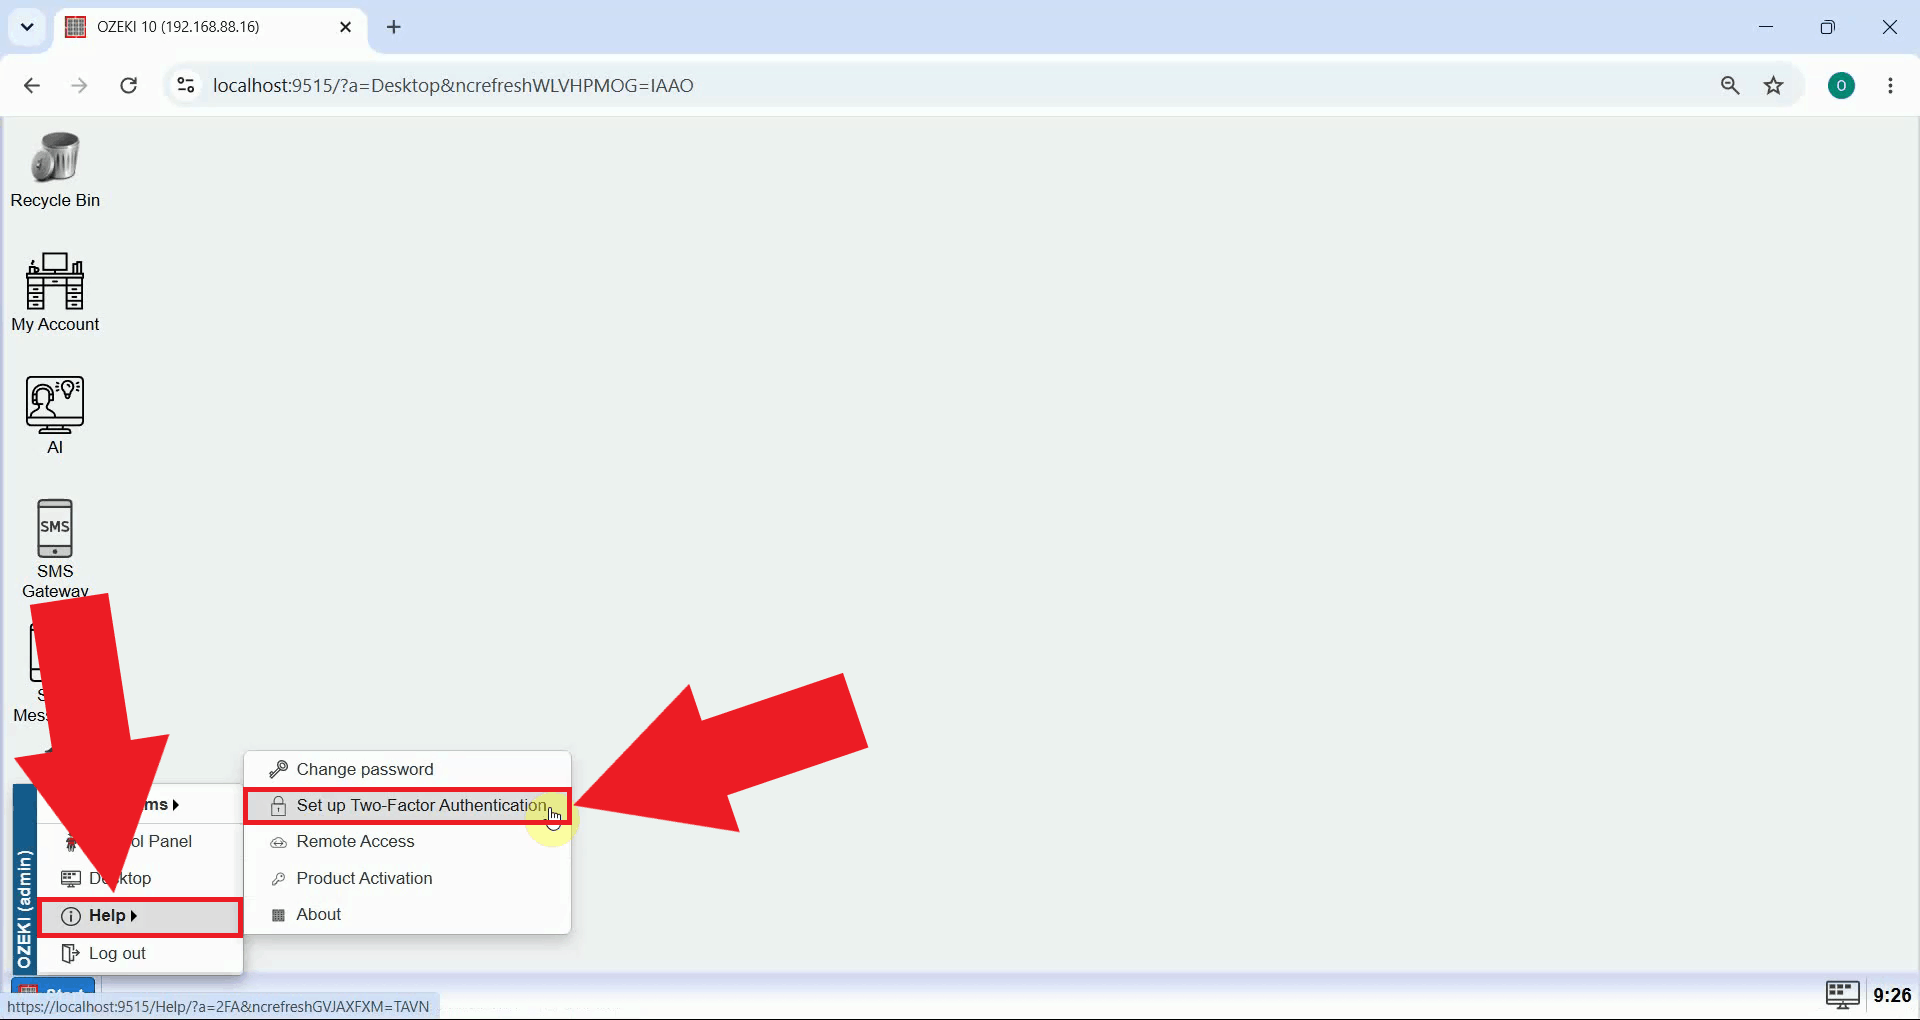
Open the Start menu on the Ozeki Desktop (Figure 5). This is where you can reach the Help menu, which contains the security related settings for your account.
Click Help, then select the Set up Two-Factor Authentication menu item (Figure 6). This will open the verification method selection screen, where you can choose how you would like to receive your second authentication factor going forward.
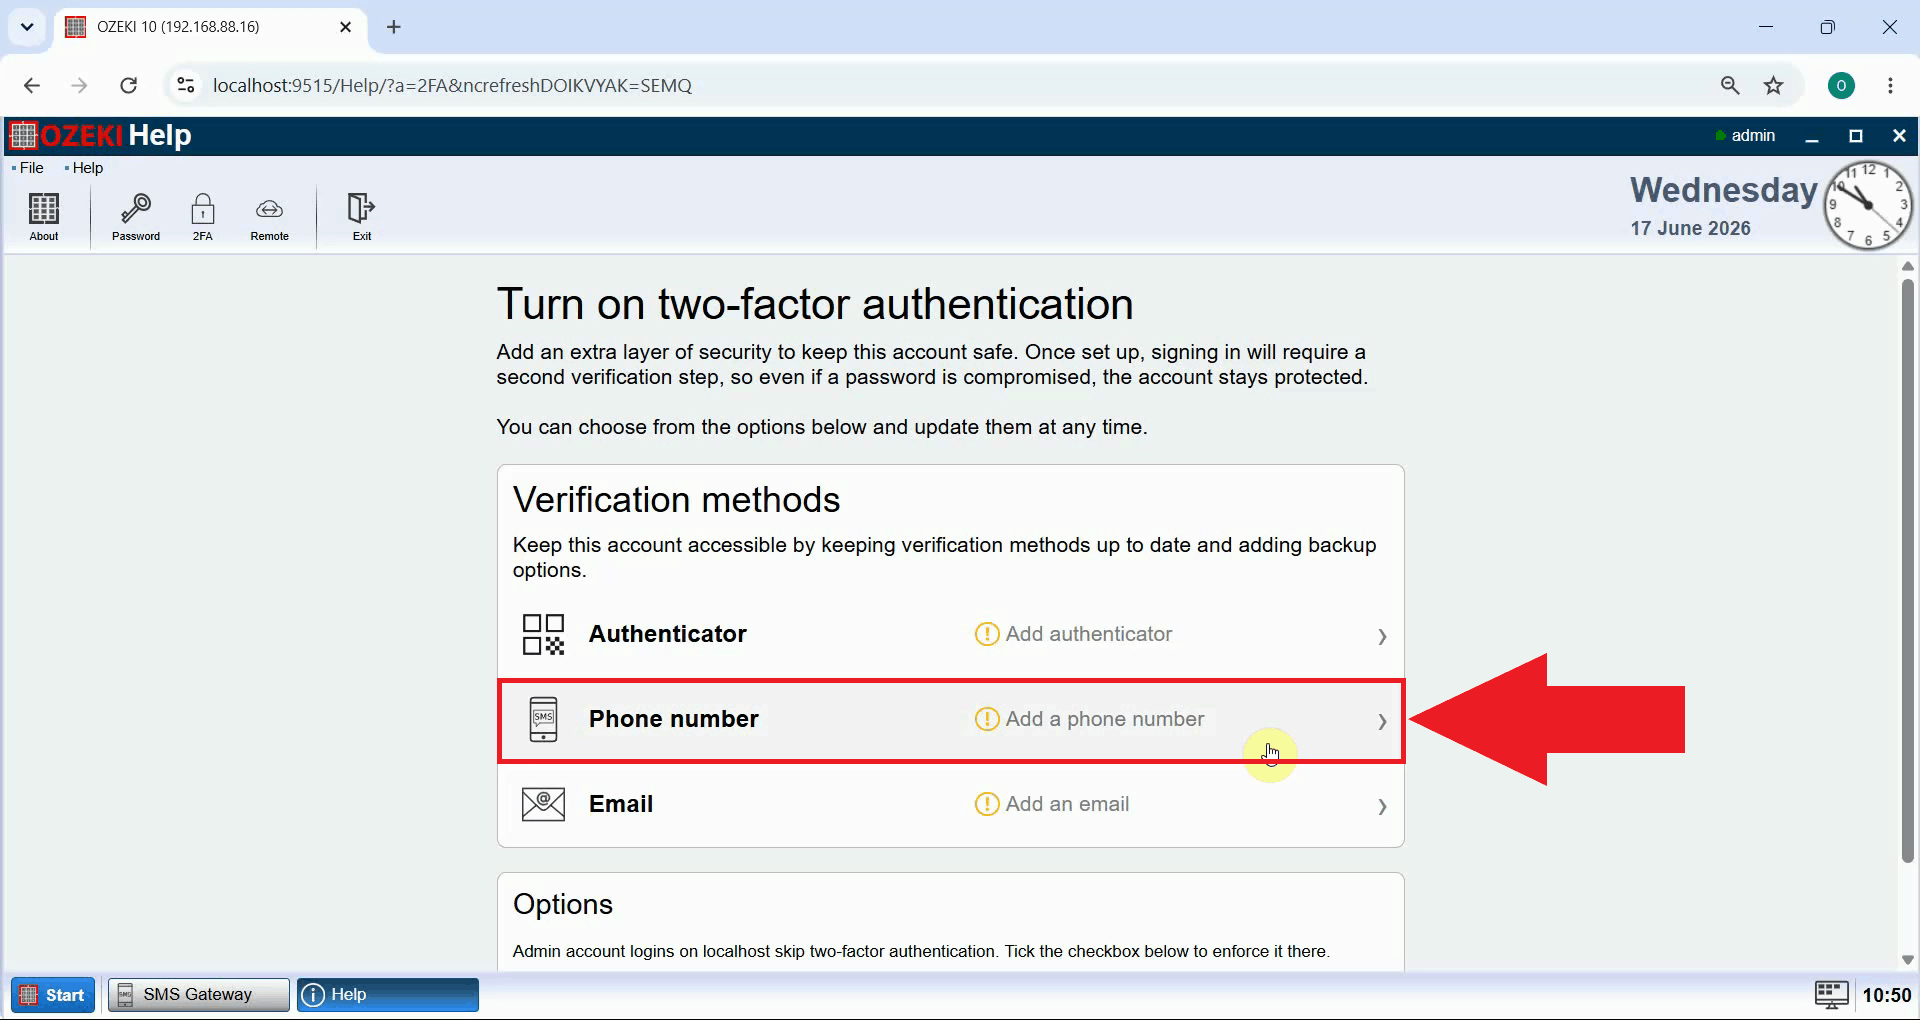
Choose the Phone number verification method from the list of available options (Figure 7). This method delivers your verification code as an SMS message instead of through an authenticator app or email.
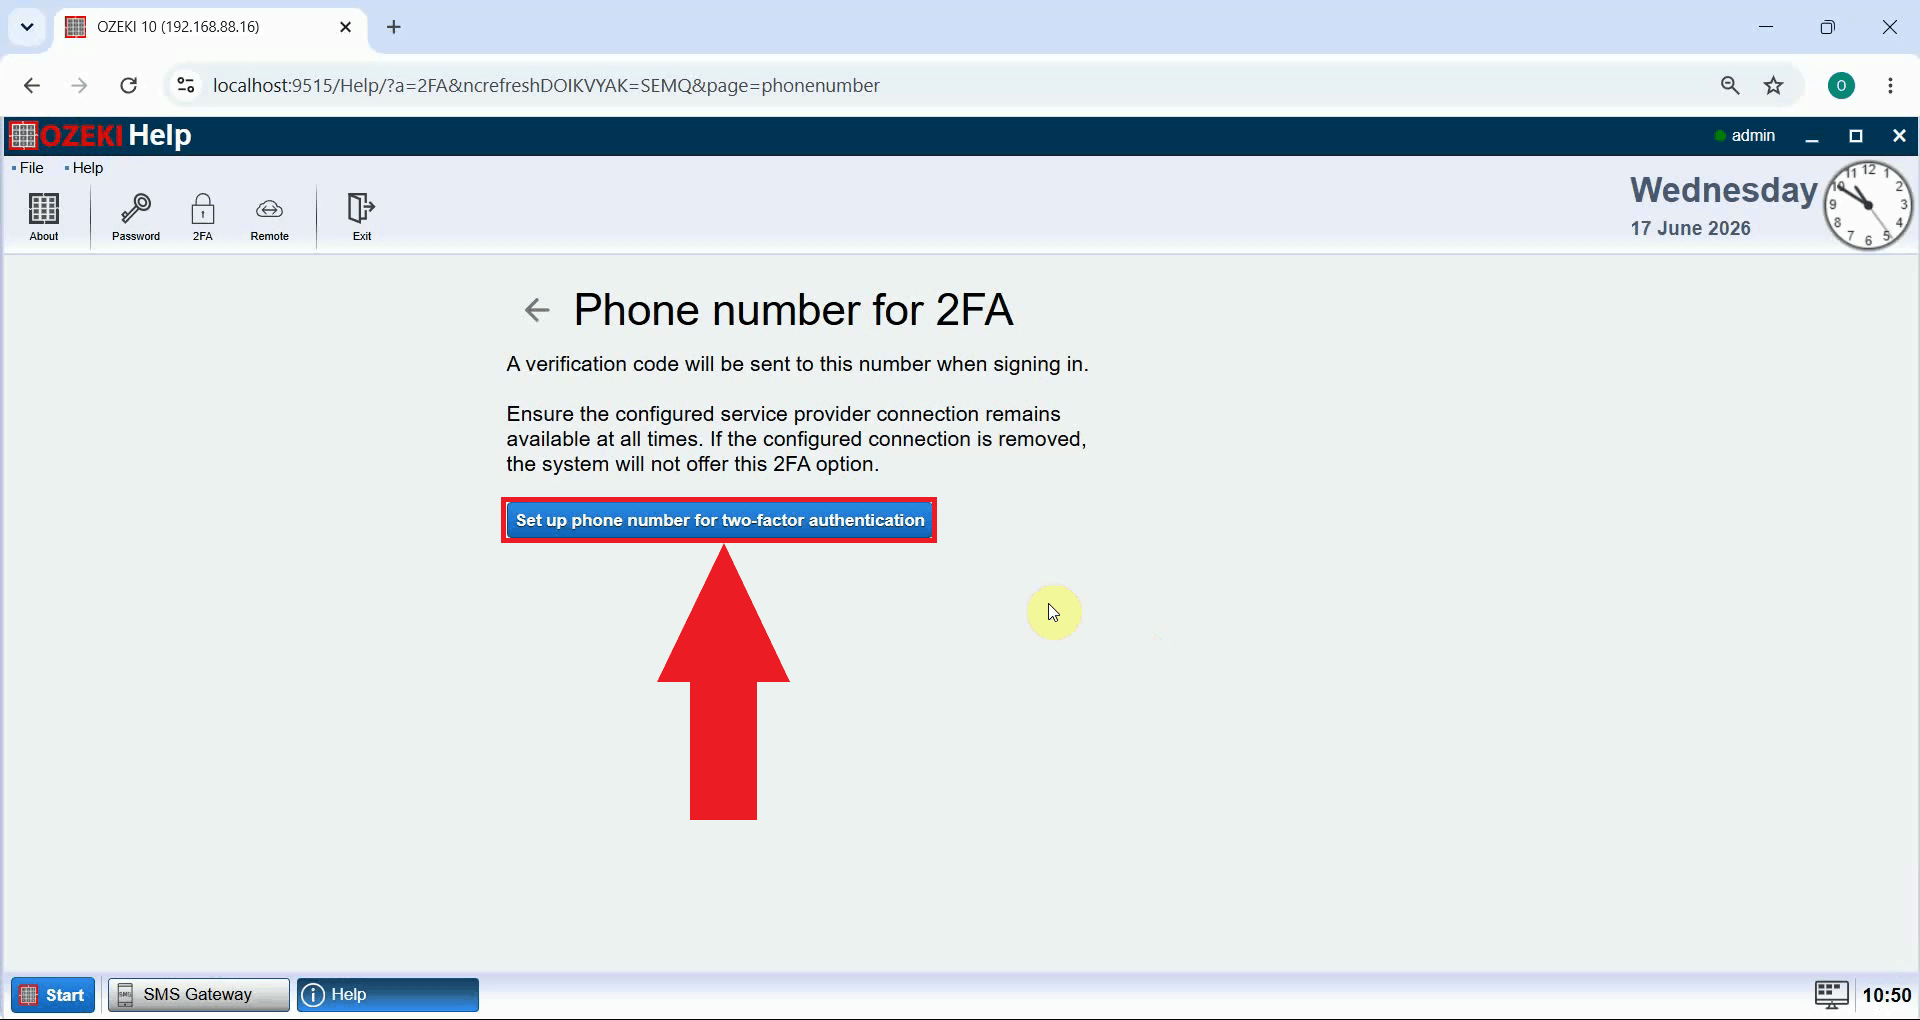
Press the Set up phone number for two-factor authentication button to continue (Figure 8). This will open a form where you select the connection that should deliver the code and enter the phone number that should receive it.
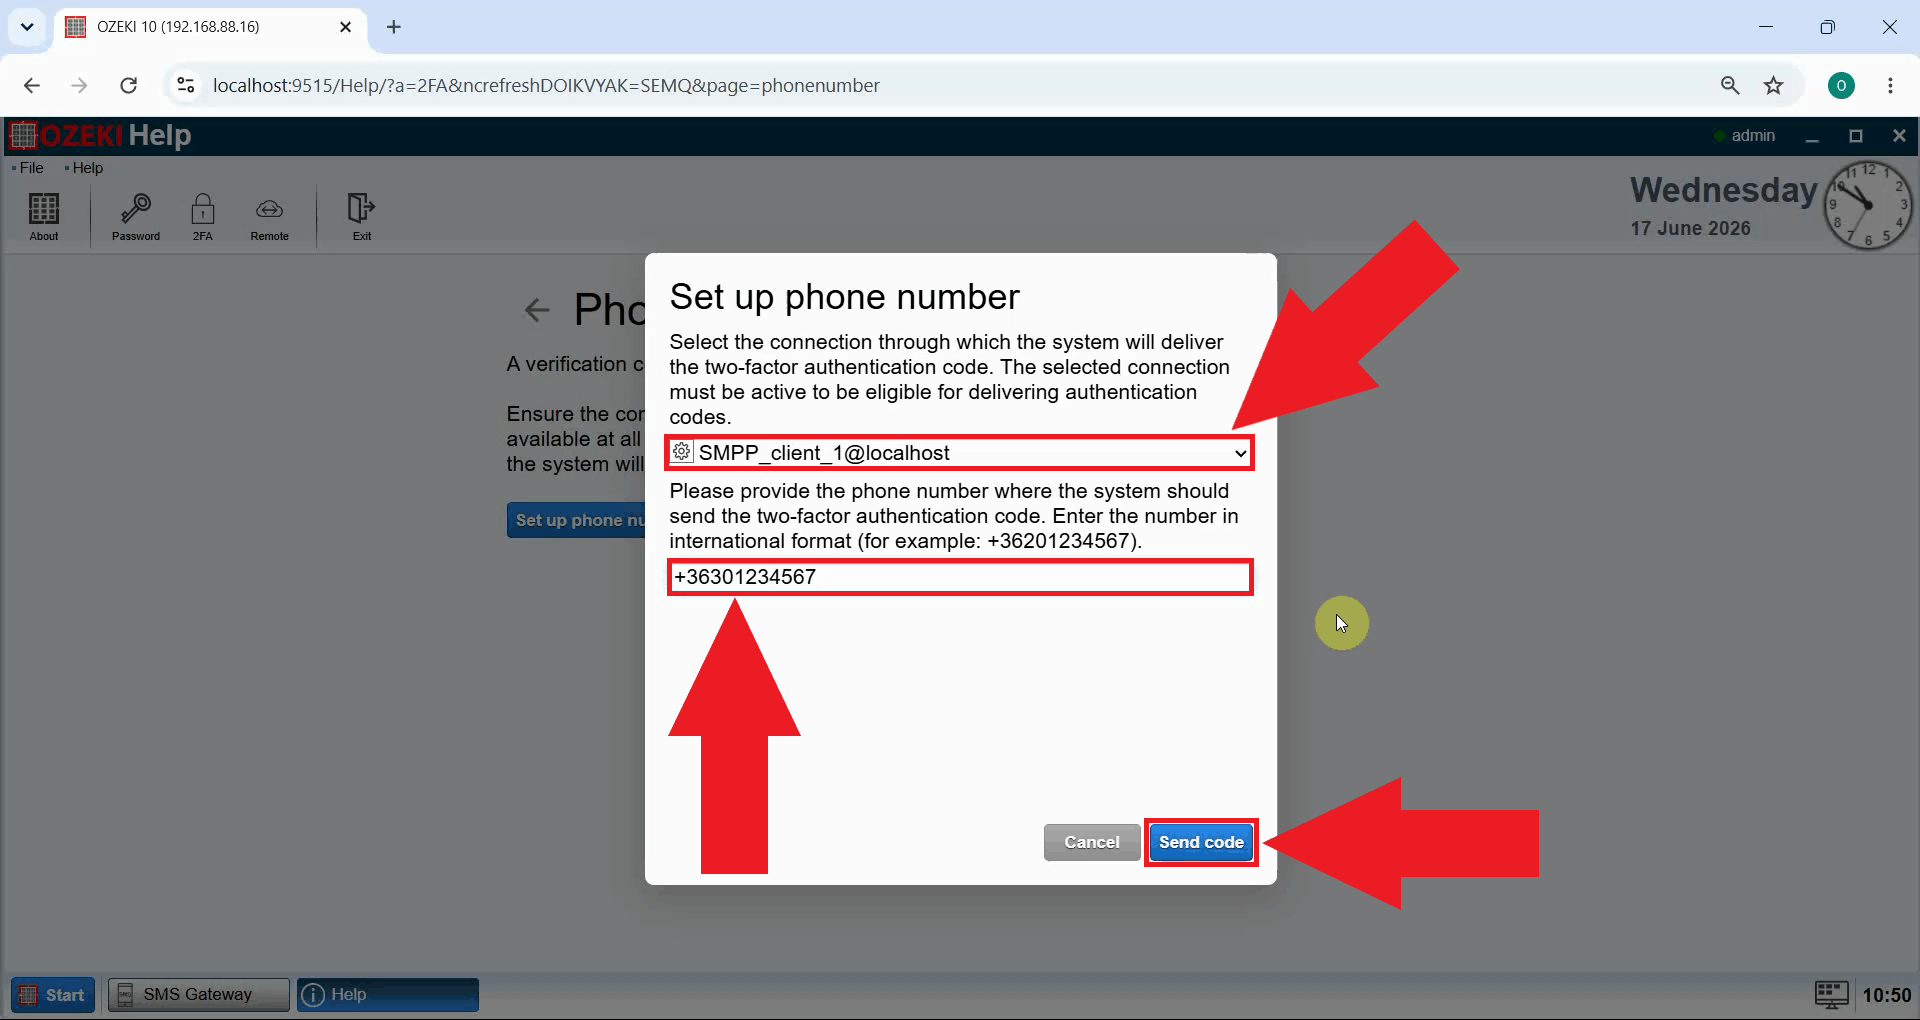
Select the connection through which the code should be delivered, then enter your phone number in international format and press Send code (Figure 9).
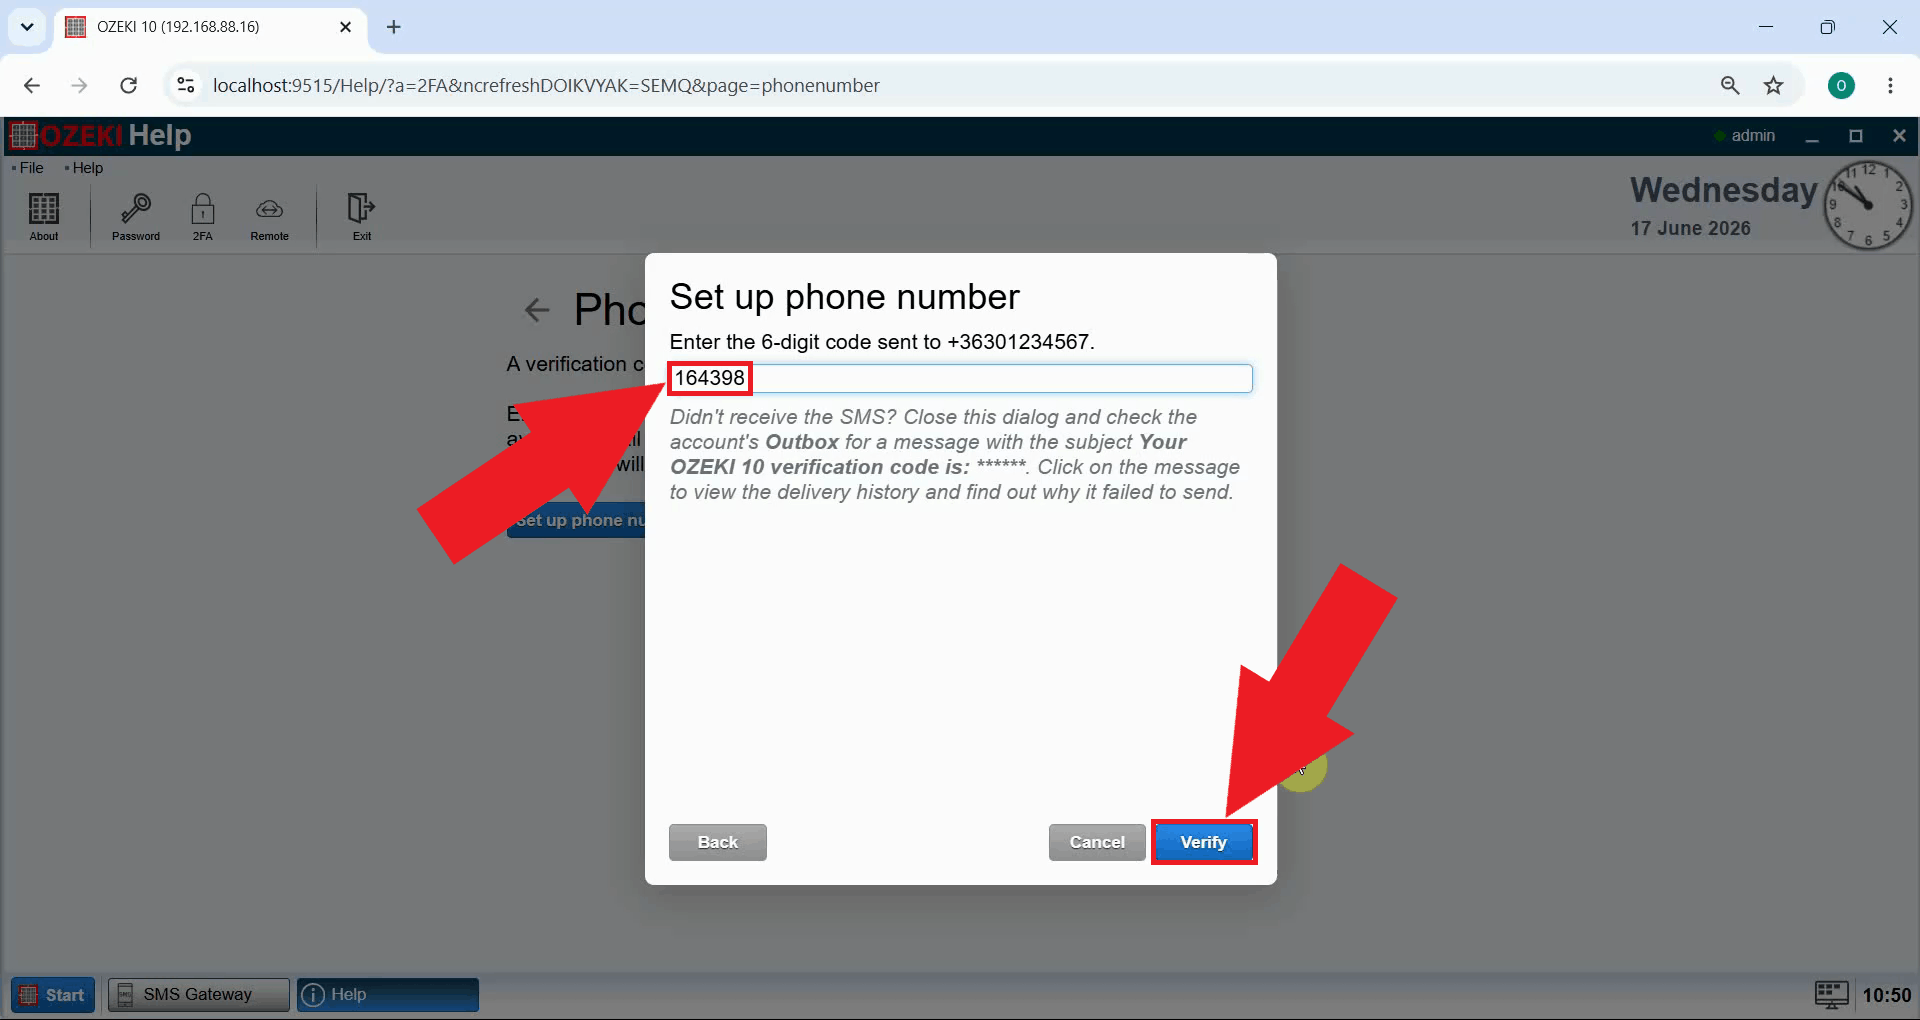
Copy the verification code from your phone (Figure 10). In a live environment this code arrives as a regular SMS message on the phone number you provided.
Paste the 6-digit code into the input field in Ozeki SMS Gateway, then press Verify (Figure 11). This checks the entered code against the one that was sent to your phone, confirming that the code you typed in is correct before the connection is finalized.
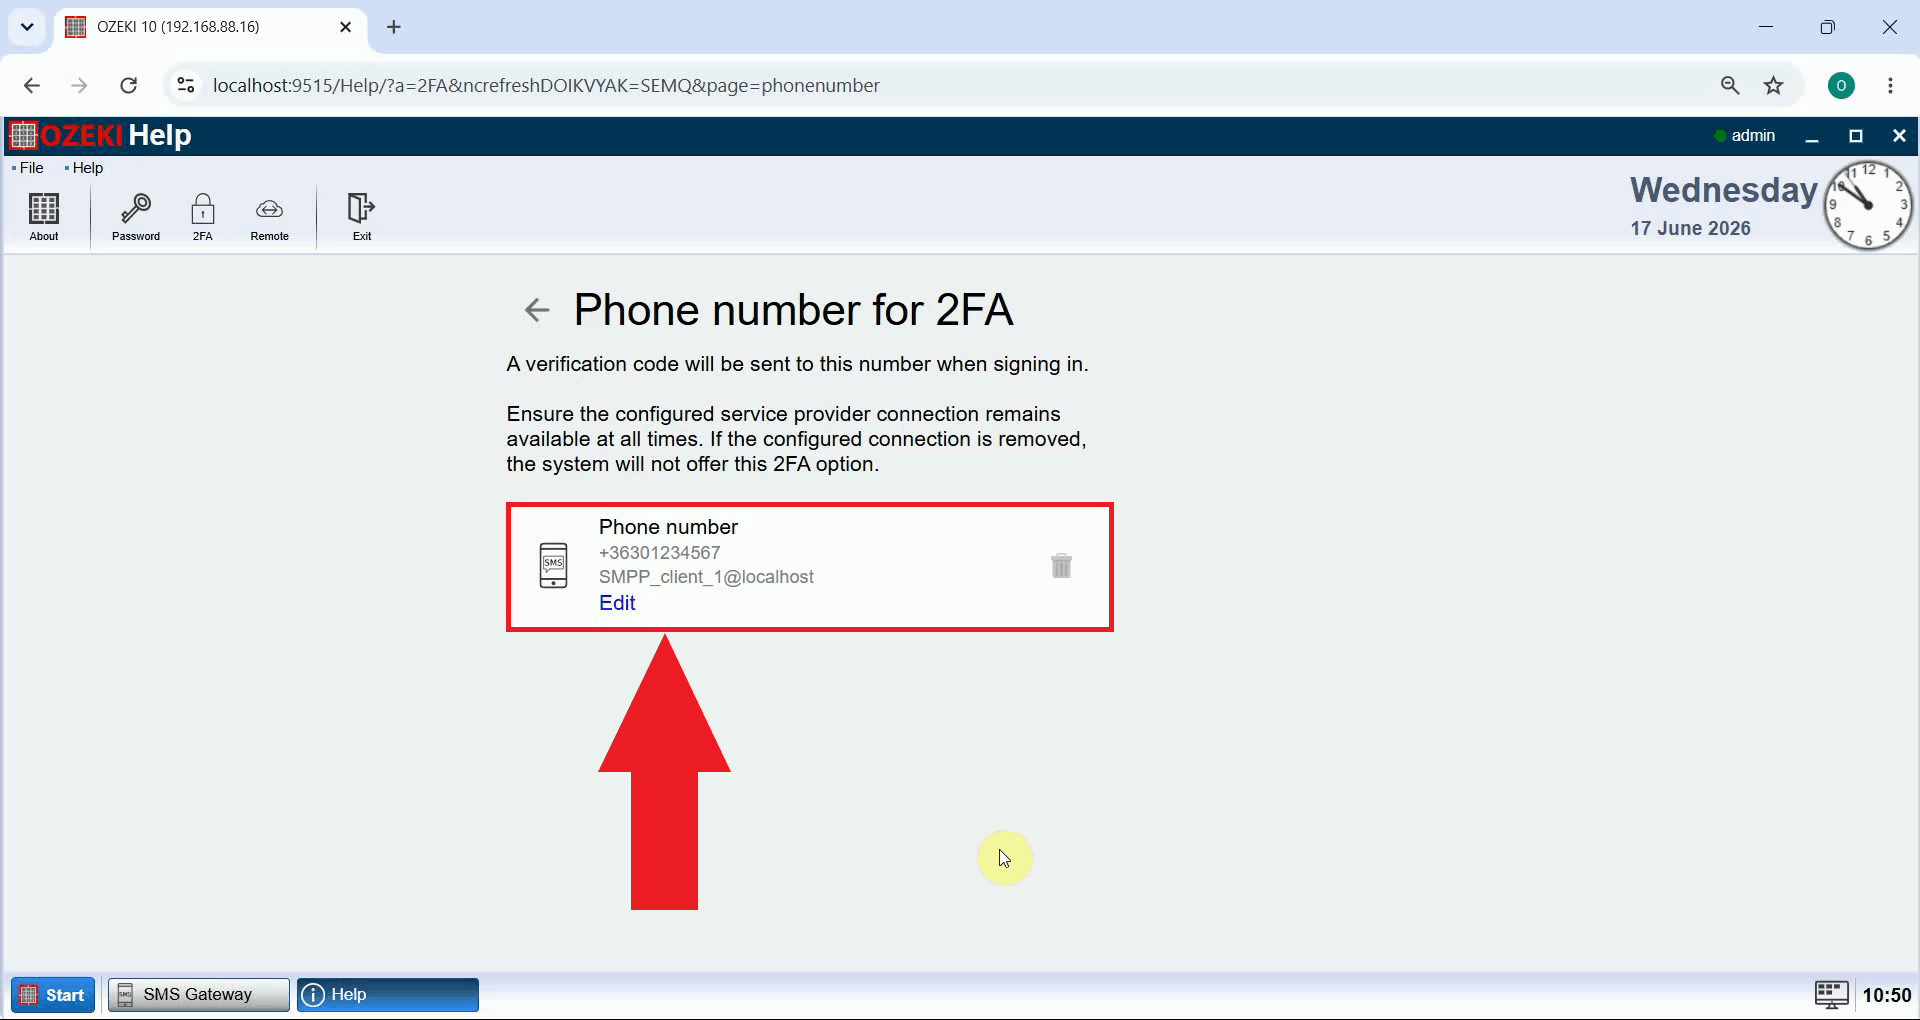
Once verification succeeds, the phone number method will be added as a 2FA option for your Ozeki SMS Gateway account (Figure 12). From this point on, you will be asked for a 6-digit code sent by SMS every time you log in, in addition to your usual password.
Log in using phone number verification
The following video shows how to log in using phone verification in Ozeki SMS Gateway.
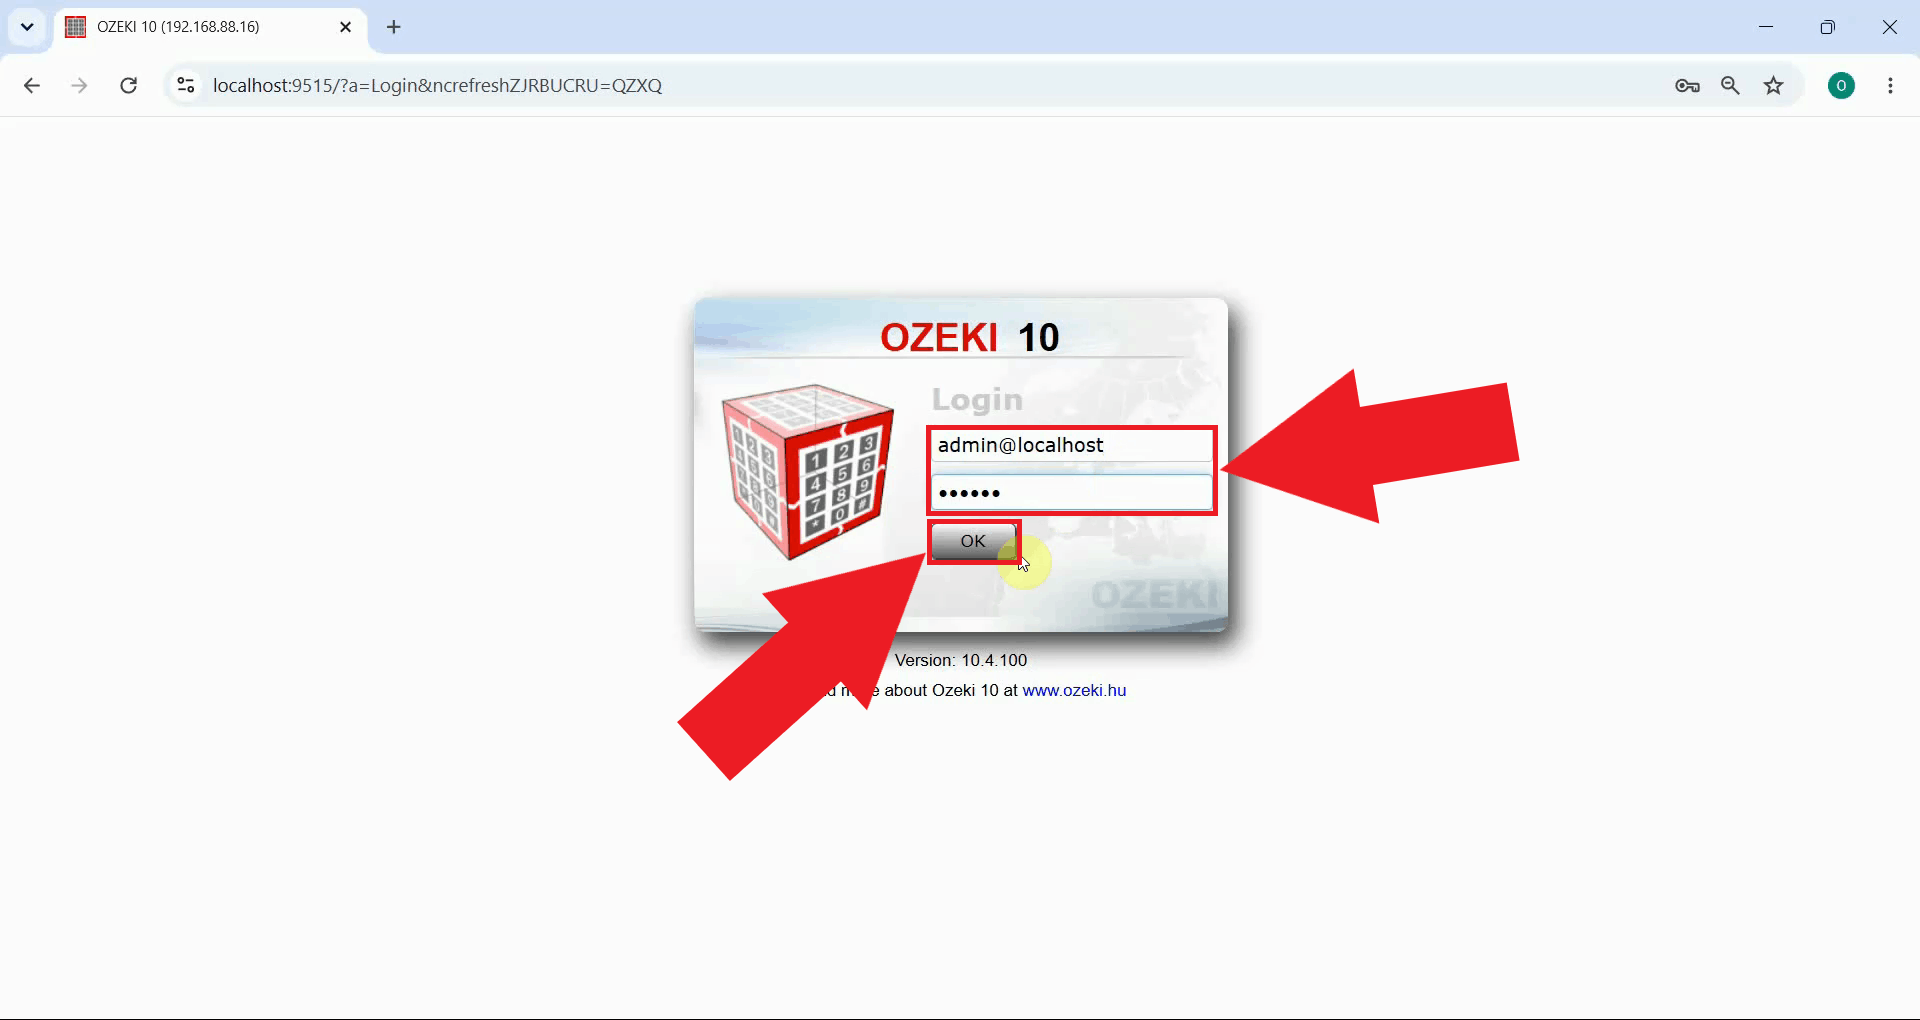
Enter your username and password on the login screen as usual (Figure 13).
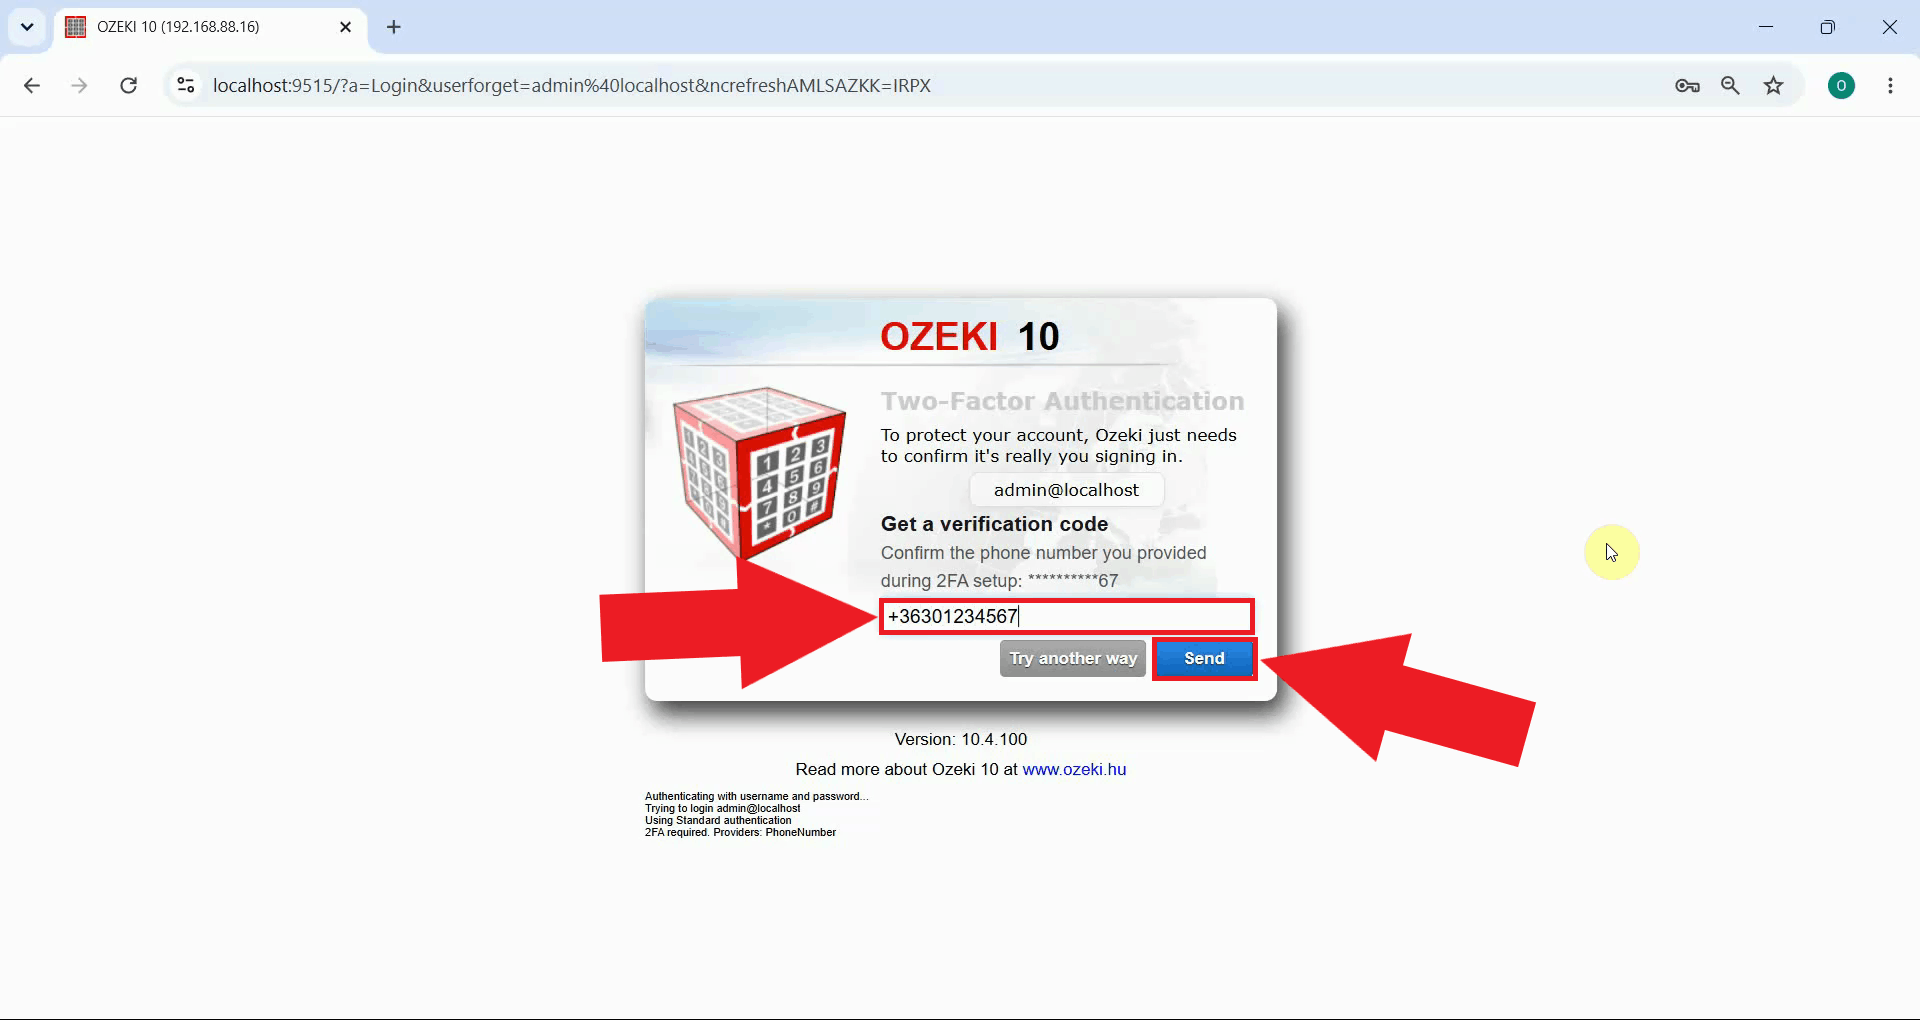
After your credentials are accepted, confirm the phone number you provided during 2FA setup by entering it into the input field, then press Send (Figure 14). The masked number shown on the screen helps you recognize which phone number the code is about to be sent to.
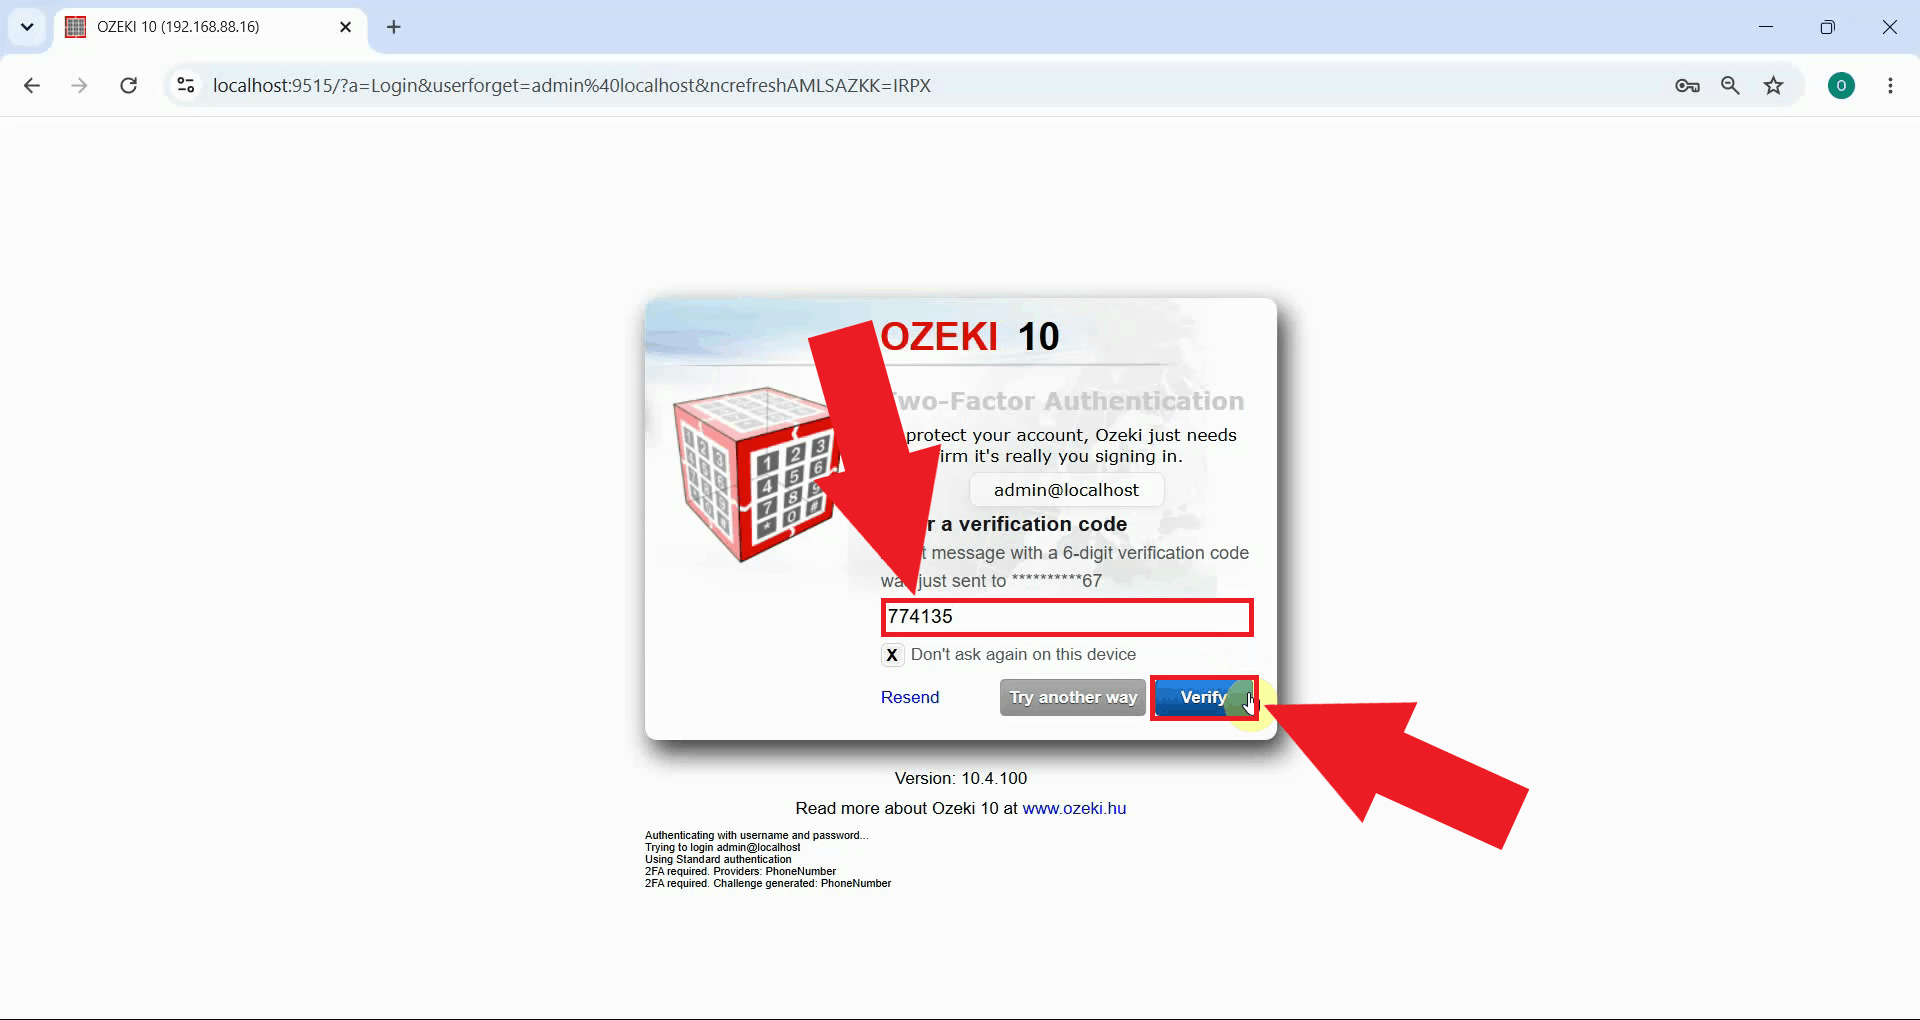
Once the phone number is confirmed, an SMS containing a 6-digit code is sent to it. Enter this code into the verification field to complete the login (Figure 15).
Summary
You have now learned how to set up a mobile network connection, enable two-factor authentication with a phone number, and log in using a code delivered by SMS in Ozeki SMS Gateway. By following the steps above, your account is protected by both a password and a one-time code sent directly to your phone, making it far more secure against unauthorized access. Ozeki SMS Gateway supports multiple verification methods, including an authenticator app and email, so you can choose the option that best fits how you work.