How to block a sender number
This section is about to show you how easy you can set sender phone number in a routing rule to drop the message. It is easy way to blacklist a phone number. This modification process makes sure that every message received from a specific phone number will drop by the SMS Gateway. The document shows you all the configuration work that you have to perform in the routing rule. It also demonstrates how you can test your system by sending a test message and see if the routing rule works fine.
How to prevent a phone number from accessing from your service (Quick guidelines)
To block a sender number:
- Launch Ozeki SMS Gateway
- Install SMPP user
- Add new route
- Configure SMS message route
- Go to Match tab
- Specify the SMS sender address
- Send test SMS from sender address
- Check logs about rejected SMS message
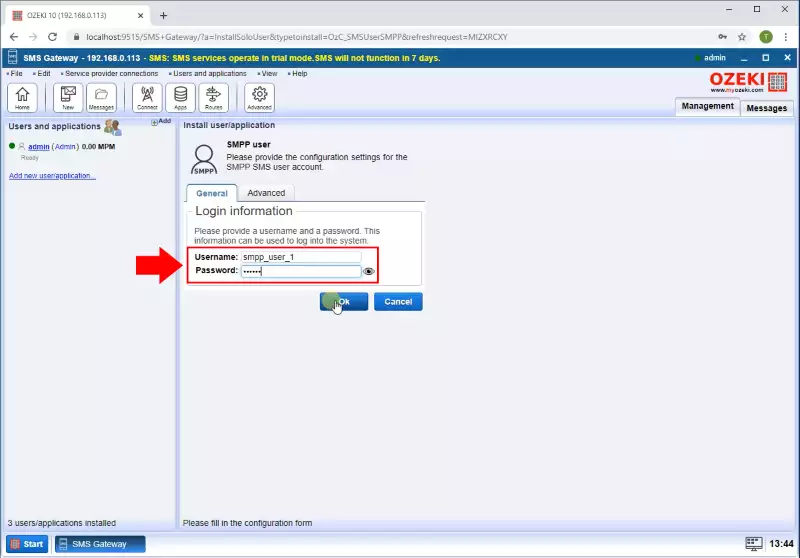
Before you configured the outgoing routing rule, you just need to set up a SMPP user. For that purpose, click the Add new user/application... link on the right of the Management Console. An interface will open, search the SMPP User and click the blue 'install' button next to it. Clicking the Install link will bring up the SMPP user installation panel. Here, you need to enter a unique username in the Username field and a password in the Password filed (Figure 1).
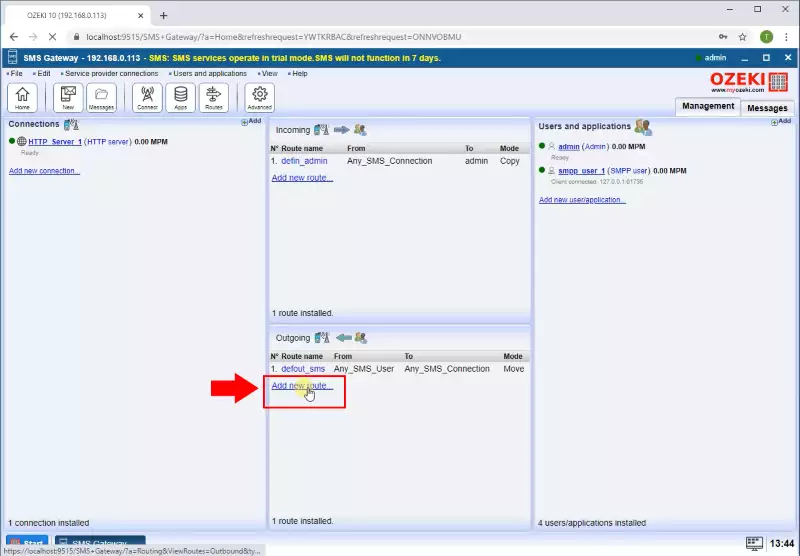
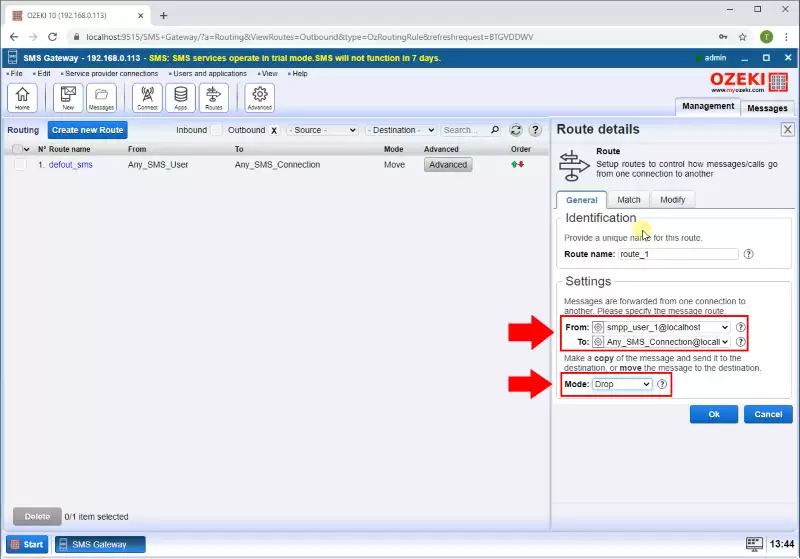
You can add an outbound routing rule by clicking add new route in the Outbound section. Then in the Settings, for the From connection, select the User connection from which you are sending the SMS, and for the To connection, select the Service provider connection through which you want to send the SMS to the service provider. In the Mode section select the drop option to make sure that the message will be rejected if it is sent from the phone number you will define. (Figure 2 and Figure 3)
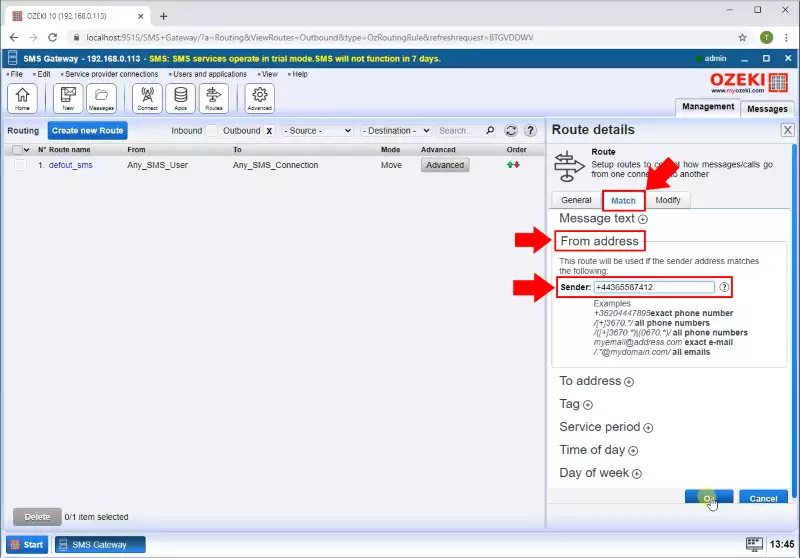
In the Match menu, you can perform all matching operation for the outgoing messages. At this point, you need to select the 'From address' submenu like in Figure 4, and here, you can just type the phone number that you want to reject every outgoing message. Finally, just click on OK to save the modifications.
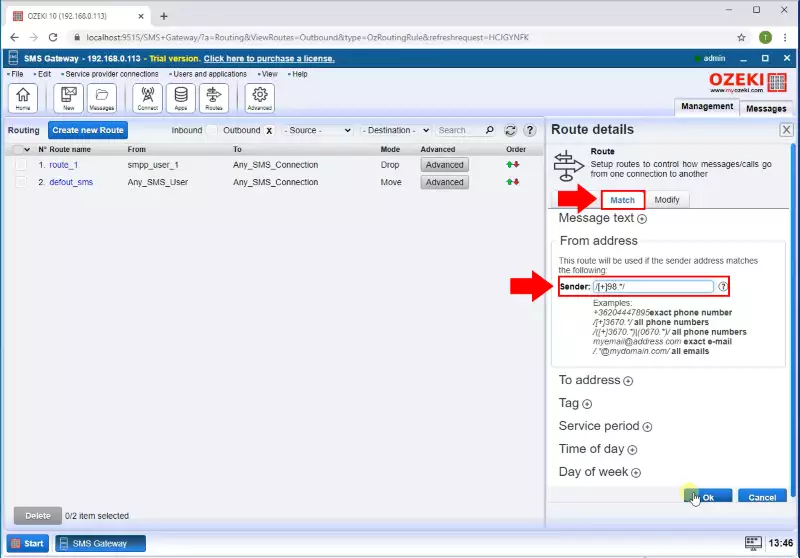
In the SMS Gateway, during routing, you have the option to Match phone number using regular expressions. In this case you can reject for example a phone number prefix too. On the Match tab, in the To address field, you can enter the phone number prefix you want to use in the given routing rule. (Figure 6)
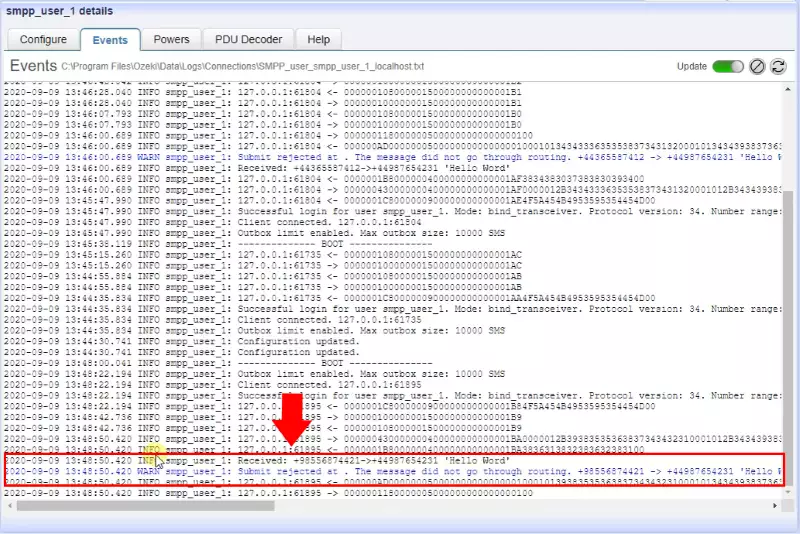
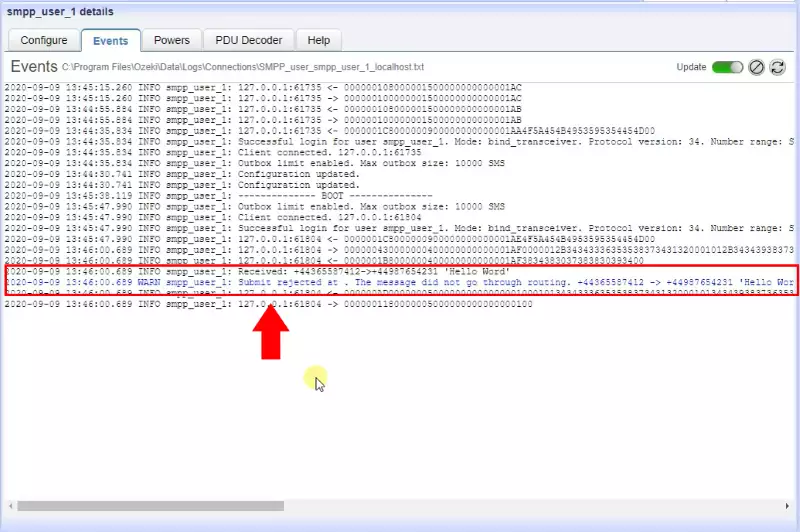
To check if the modifications worked, you need to open the SMPP client and select the Events tab. Here, you can see every event of the SMPP client connection. As Figure 7 shows that, the routing rule reject the from address, so the SMPP client drop the message.
