How to send SMS from Python
This page contains a simple Python script, which is going to demonstrate how easy you can send SMS messages from that script by initiating an HTTP request and forward it to the SMS Gateway which will further processes the request, sends the message and returns a response message to the Python script. As the example script shows below, all these operations only take about twenty lines of code which keeps the script simple.
What is a Python SMS API?
The Python SMS API creates the opportunity to send SMS messages from a Python script. By using this Python SMS API, your Python script can send HTTP requests to the SMS Gateway which sends the SMS message.
Prerequisites
Send SMS from Python
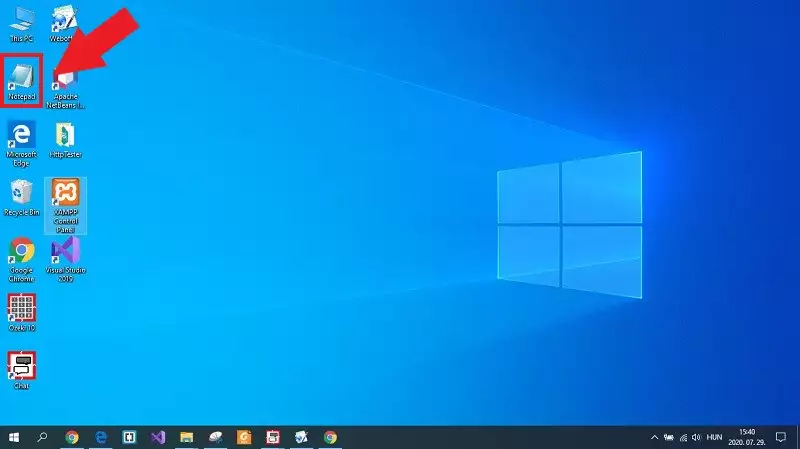
- Open Notepad
- Create a new empty file
- Copy-Paste the example Python source code below
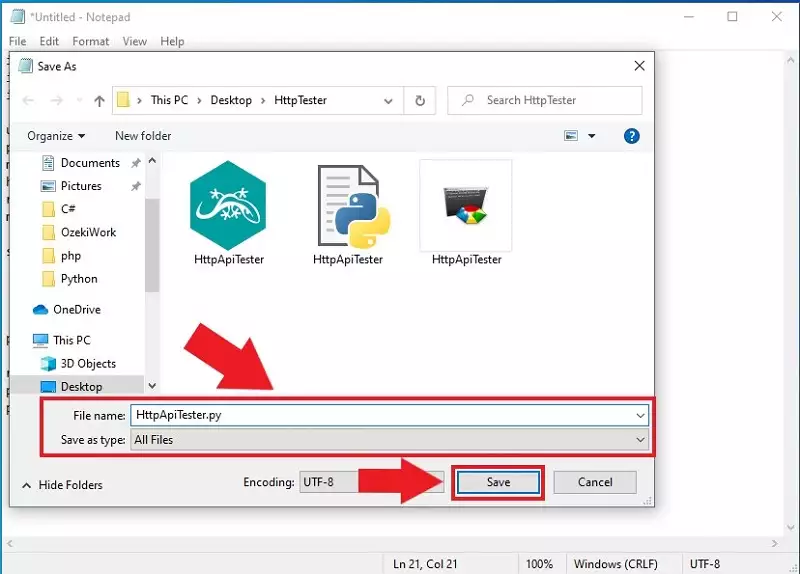
- Save the file as HttpApiTester.py
- Open Command Prompt
- Navigate to the folder where you saved the Python file
- Type 'python HttpApiTester.py' in the Command Prompt
- Hit Enter to run the Python script
Python SMS source code example
The following example source code written in Python programming language is free to use, you can simply implement it into your project, or you can modify the source code to use it for other projects or applications. If you wish to run this example code unchanged, you just need to create a new Python file, copy-paste the example code below and save the Python file. Then, all you have to do is to run the Python file as the steps guide and the video demonstrates it above.
import requests
import urllib.parse
import ssl

username = "john"
password = "Xc3ffs"
messagetype = "SMS:TEXT"
httpUrl = "https://127.0.0.1:9508/"
recipient = urllib.parse.quote("+36201324567")
messagedata = urllib.parse.quote("TestMessage")

sendString = (httpUrl + "api?action=sendmessage" + "&username="
	+ username + "&password="
	+ password + "&recipient=" + recipient + "&messagetype=" +
	 messagetype + "&messagedata=" + messagedata)

print("Sending html request: " + sendString)
requests.packages.urllib3.disable_warnings()

response = requests.get(sendString, verify=False)
print("Http response received: ")
print(response.text)
Step 1 - Open a text editor
To be able to execute the Python SMS example code above, first, you need to create a Python file which contains the source code. To perform this action, you only need a text editor. You can download a custom text editor if you wish, but the default Notepad application installed on Windows can do the job as well. So, as Figure 1 demonstrates that, just click on the icon of Notepad to open it.
Step 2 - Copy the source code from this page
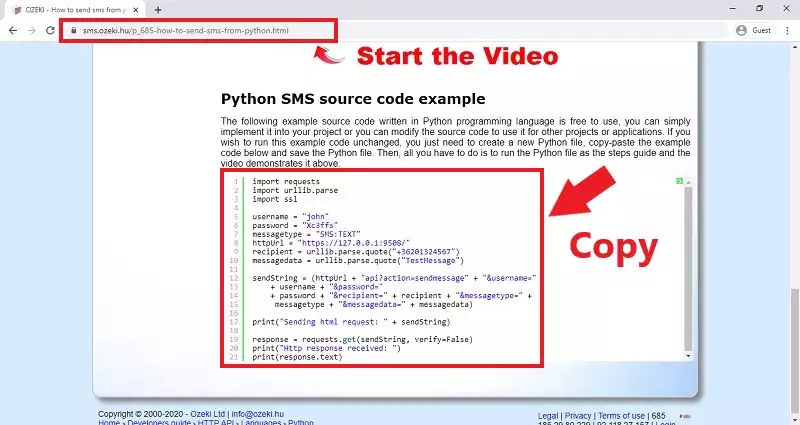
The next step of the guide is to get the Python source code. This can be easily done, since the code can be found on this page, so you just need to copy that. So, as Figure 2 shows that, just go to the example code section on this page, mark out the whole source code and press Ctrl+C on your keyboard to copy the source code to the clipboard.
Step 3 - Paste the code into the text file
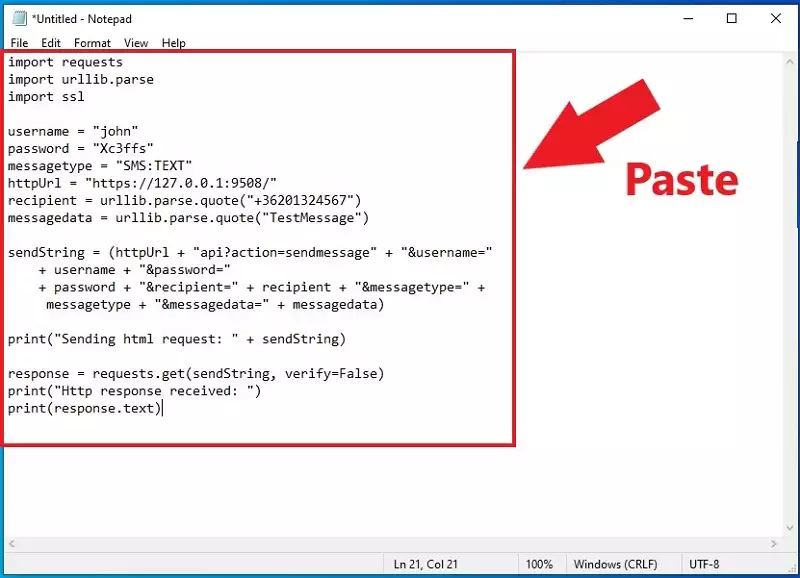
After you copied the code from this page, you need to paste it into your empty text file. To do that, you just need to navigate to the text file and just press Ctrl+V on your keyboard. By performing this action, the Python code will be pasted into your text file as Figure 3 shows that.
Step 4 - Save the text file as Python file
To create the Python file, you just need to save the text file with the file extension of the Python files. This extension is .py. So, select the 'Save as' option in Notepad, and as you can see it in Figure 4, and after you gave a name for the file, append it with the '.py' file extension and click on 'Save'. The operation just created the Python file that you need to run the Python SMS example.
Step 5 - Open Command Prompt
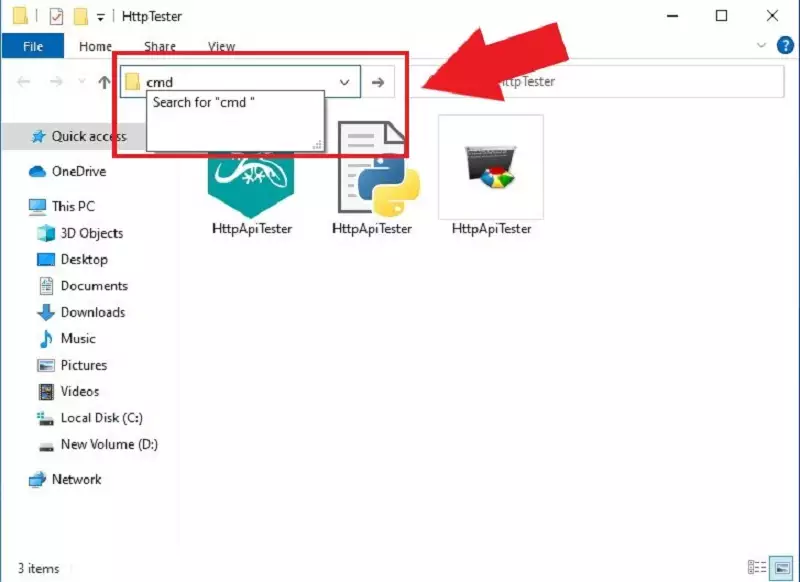
The next step of this guide is to run the Python file you created before. In this case, you are going to run the example using the Command Prompt. You can easily open the Command Prompt by opening the File Explorer, and as you can see it in Figure 5, just type 'cmd' in the address bar and lastly, just press Enter. If you navigate into the folder where you saved the Python code in the File Explorer, the Command Prompt will use this location as default, so you just need to run the Python file.
Step 6 - Run the Python file
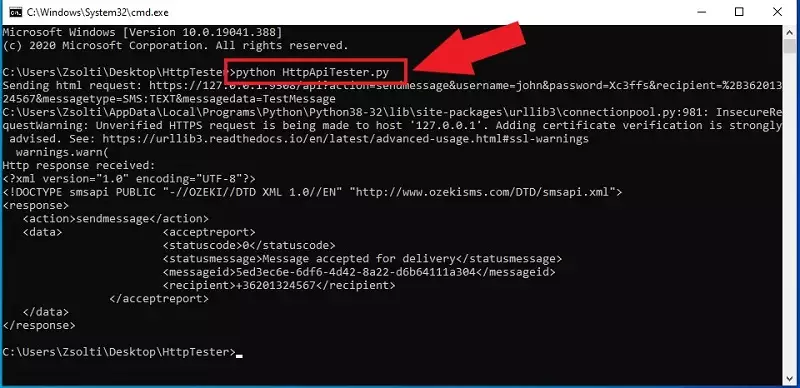
The last step that you need to do, is to initiate the command, that runs the Python script. This is a simple command; you just need to write 'python *file name*.py' in the Command Prompt as Figure 6 shows that. After you pressed Enter, the Python file executes the commands within and sends the test message. The HTTP request and response from the SMS Gateway will be printed in the Command Prompt.
Step 7 - Check the send result in the Ozeki log
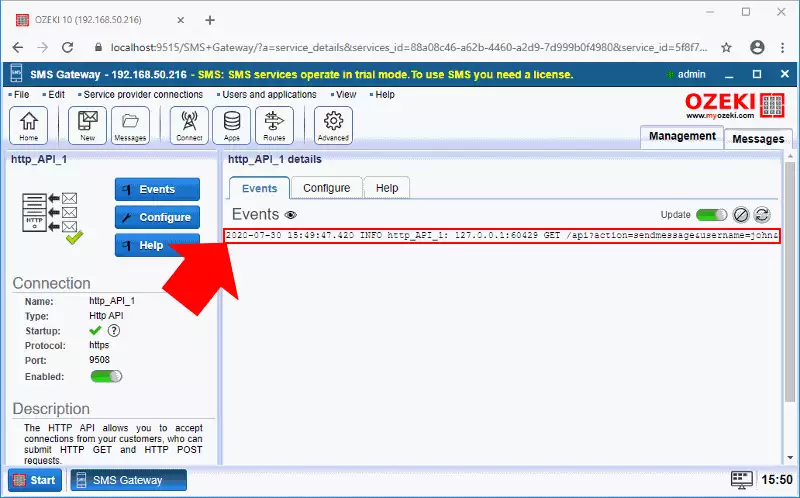
In Ozeki 10 SMS Gateway, you can check easily what messages sent by your application, since the HTTP API service logs every event that occurred during the time it is enabled. So, if you open the SMS Gateway, and select details of the HTTP API service, you will be able to see the events. As you can see it in Figure 7, the service logged an event, when the Python SMS example program sent the HTTP request to the service.
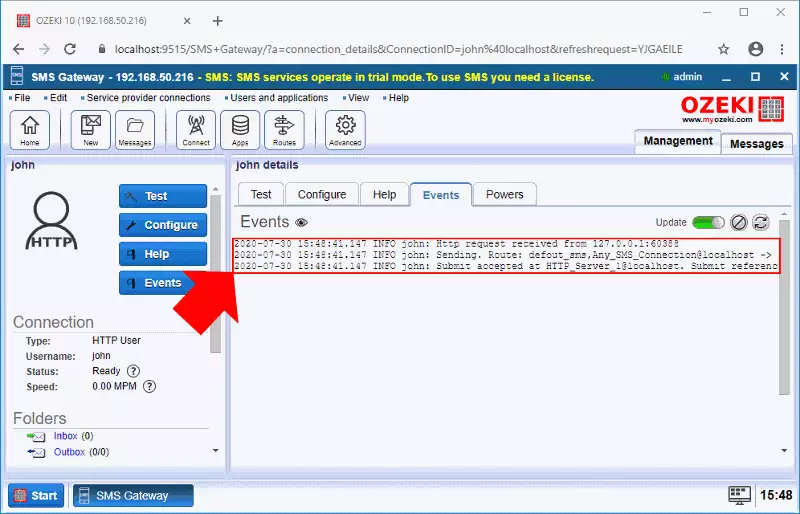
The process of the message sending can be also viewed back by the events. For that, open the HTTP API User connection, that you had to configure before. In Figure 8, you can see that how the connection handles the HTTP request and send the message to the recipient that you specified in your Python program.
Summary
You have learned how to send SMS from Python from this article. This tutorial enables you to implement SMS service to your Python project. Having SMS service in your python project will make sure that you satisfy a wider range of customer needs. The solution is mainly built around the Ozeki SMS Gateway, so it offers you a great performance of up to a 1000 SMS per second. If you come around any error, the Ozeki SMS Gateway features great low logging capabilities. You will find errors in no time using this system.
To have a better understanding of using Python with the Ozeki SMS Gateway, feel free to visit the Ozeki webpage. You can learn about how to receive messages using Python, or you can discover other programming languages to use like Java.
The next thing to do is to download the Ozeki SMS Gateway and start developing now!
