
How to start an Application with SMS
Ozeki SMS Gateway's Application Starter User can run any process or application in case an SMS message arrives. You simply need to provide the file path. You can also fetch parameters from received SMS messages to use them as process parameters or command line arguments.
What is the Application Starter User?
The Application Starter User is a connection type in Ozeki SMS Gateway that runs a program or script whenever a specific SMS message arrives. You give it the full path to a file, either a batch script or the executable of an external application, and it launches that file the moment a matching SMS is received. The sender's number and the message text can be passed along as arguments, so the triggered program has access to who sent the message and the message text.
How does it work?
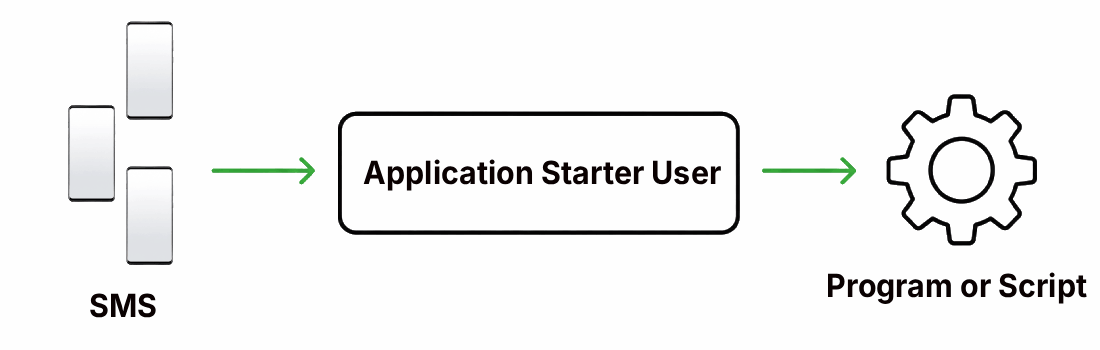
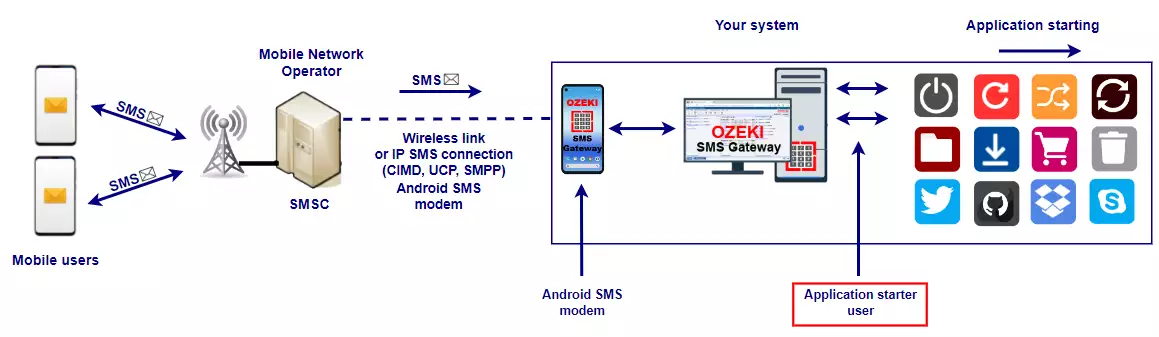
A mobile user sends an SMS, which travels through the Mobile Network Operator's SMSC and reaches your system over an SMPP, CIMD, or UCP connection, or through an Android SMS modem attached directly to your machine. Ozeki SMS Gateway receives the message and hands it to the Application Starter User, which then launches the configured program or application. From there, the started application can be anything you've set up to run this way, from a simple script to a full desktop application.
Video tutorial
The following video shows how to set up the Application Starter User in Ozeki SMS Gateway, from installing the connection to configuring the file path. It walks through running a batch script in response to an incoming SMS, giving you a complete picture before the step-by-step instructions below.
How to start an application using an SMS
To start an application using an SMS:
- Select Apps toolbar icon
- Install Application Starter app
- Name the connection
- Enter program to execute
- Set Operation mode
- Click on the Connect toolbar icon
- Add new SMPP client connection
- Configure Ozeki service
- Allow service to interact with desktop
- Send test SMS
Step 1 - Create the Application Starter connection
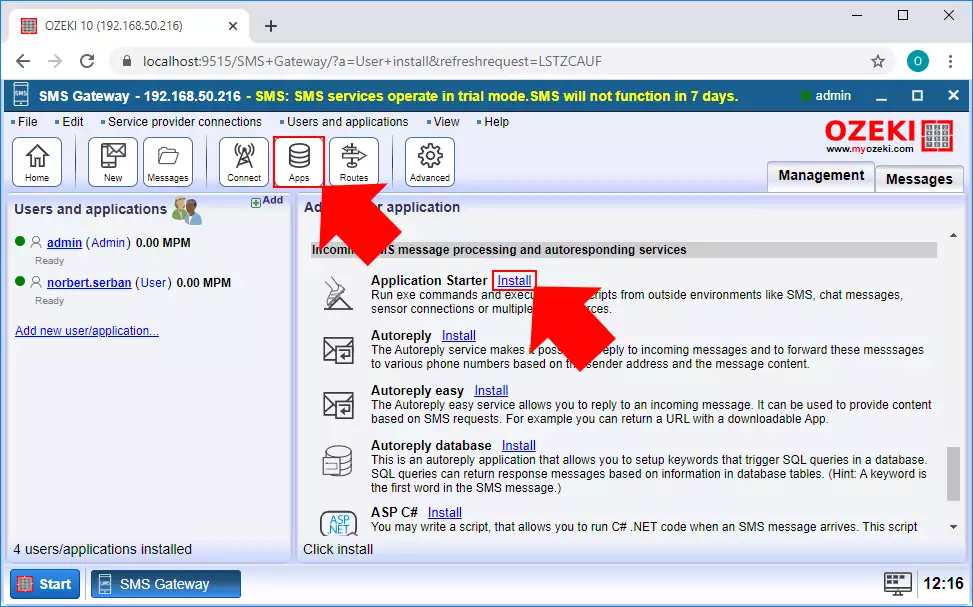
The first step is to open the SMS Gateway application. Here, in the main menu, you should select the Apps menu on the toolbar. In this menu, just scroll down to the 'Incoming SMS message processing and autoresponding services' section, and here, click on the Install button of the Application Starter connection (Figure 1).
Step 2 - Configure the Application Starter connection
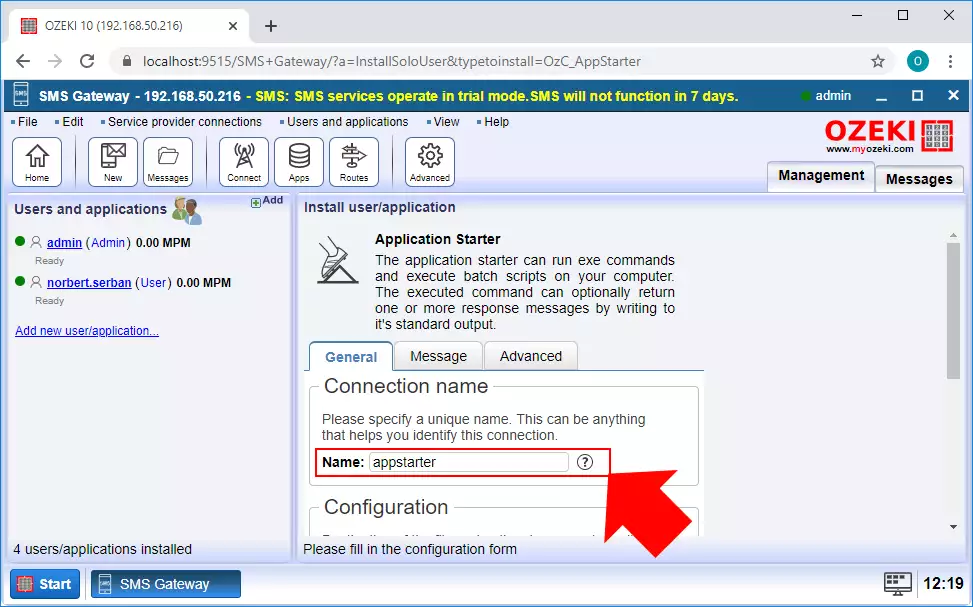
Next, you need to configure your Application Starter connection. First, you need to type a name for the connection (Figure 2). This will identify the connection in your SMS Gateway system. Next, you need to configure the program that the connection is going to execute. The two main ways will be discussed in the next step.
Step 3 - Select a program to execute
The Application Starter connection can process both bash scripts and the executable files of external applications. So, the first way is to run a bash script. In this example, you need to create a bash script with the '.bat' file extension. As Figure 3 below shows, you need to provide the full path for the bash script. You can also add arguments for the execution. Here, there are two arguments. The '$SENDER' argument stores the address of the sender who sent the message, while the '$MSG' argument stores the message itself.
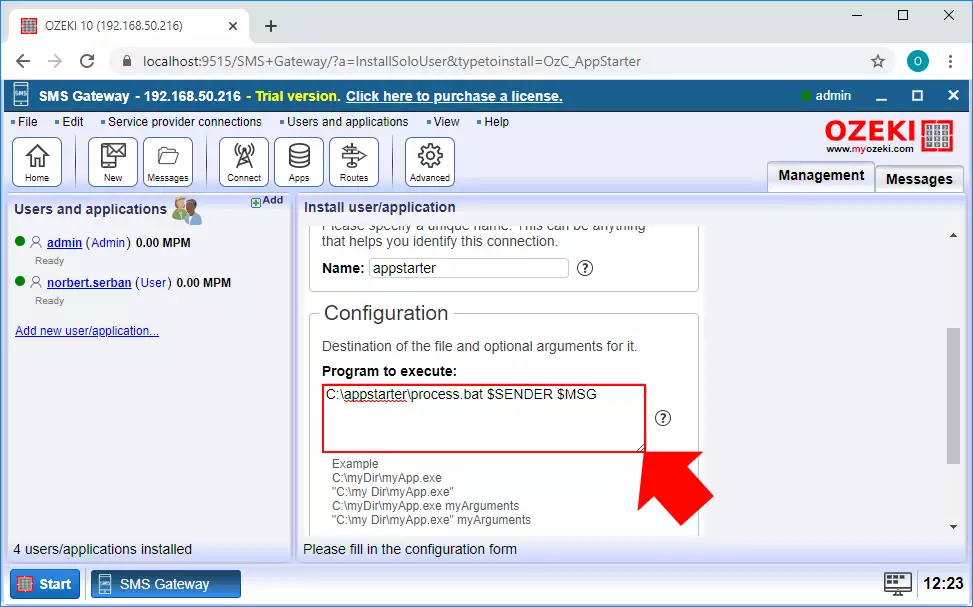
Now, you need to write the bash script. The example below is going to take the two arguments that you set in the Application Starter connection and write them in the inputsms.txt file. If the file does not exist yet, the script creates it; if the file already exists, the script appends the new message to the file.
C:\process.batecho %1 %2 >> C:\inputsms.txt
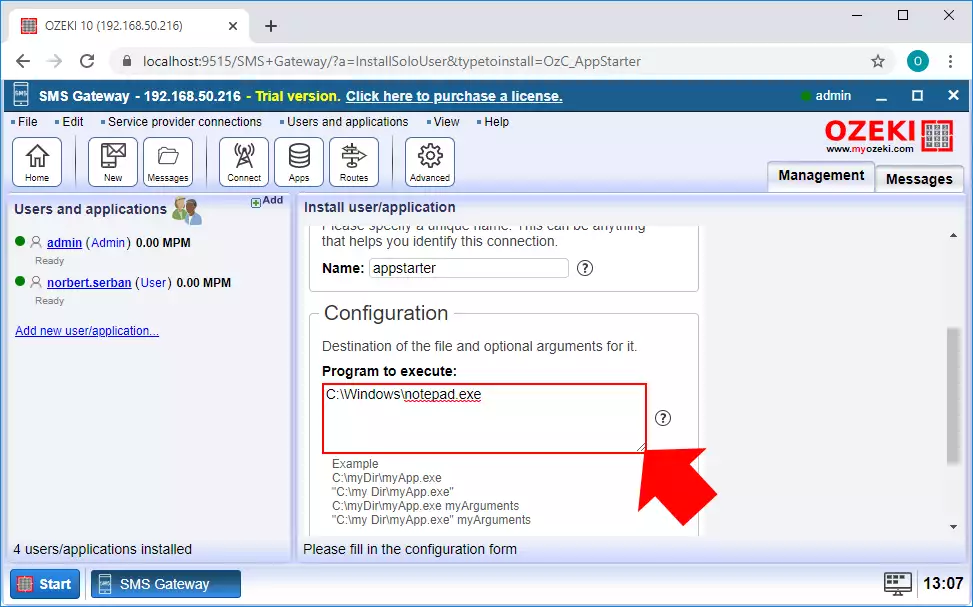
The second way to configure the Application Starter is to run an external application. For that, you need to specify the full path of the application that you want to run in case of an incoming message. This guide shows you how you can start the default Notepad application with an SMS, as you can see in Figure 4.
Step 4 - Further configuration of Application Starter
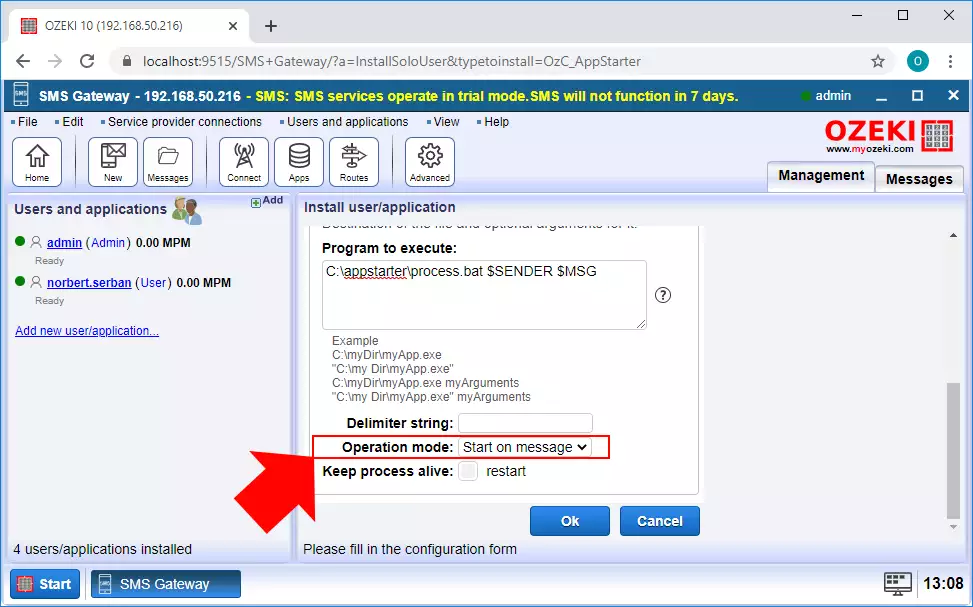
The last thing that you clearly need to configure before creating the connection is the mode that the application is going to run in. This can be set by the 'Operation mode' option. Here, as you can see in Figure 5, select the 'Start on message' option. This will ensure that the program you previously set to execute will only run if an incoming message occurs. Once you have finished with everything, just click OK.
Step 5 - Create an SMPP client connection
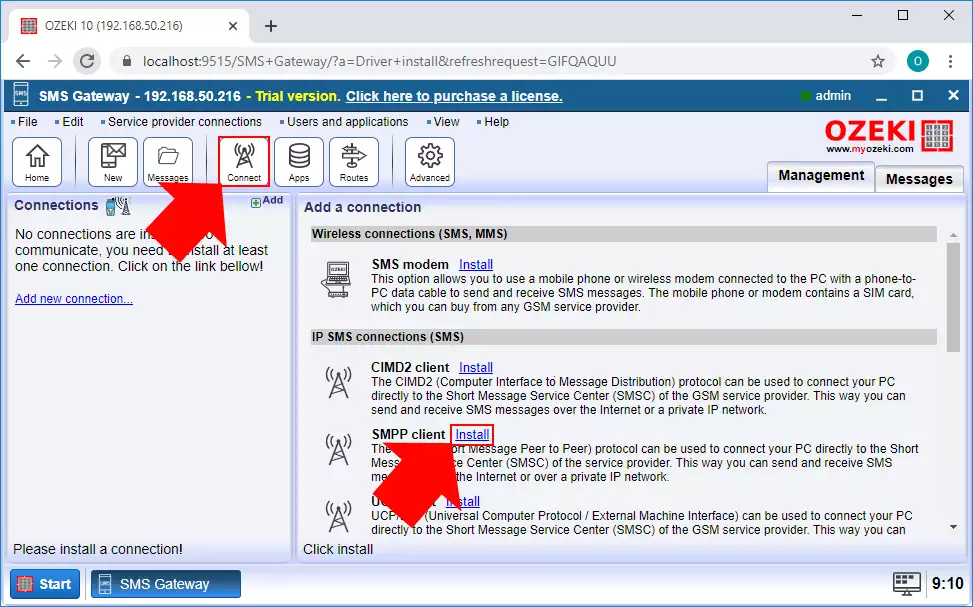
To be able to communicate with the members of the mobile network and receive the starting message, you need a connection that creates that link. This connection will be the SMPP client connection. To create this connection, just select the Connect menu from the toolbar, and here, as you can see in Figure 6, click on the Install button of the SMPP client connection.
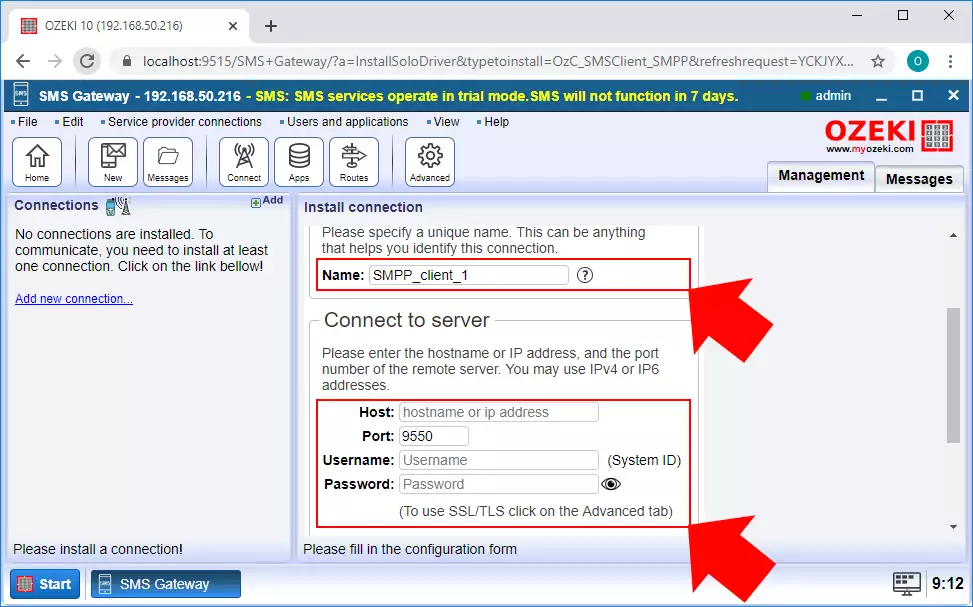
In the configuration menu of the connection, first you need to type a name for the connection. Next, you have to provide the details of the SMPP server that you want this connection to connect to (Figure 7). Lastly, type the phone number that the connection will use to communicate with the mobile network. Once you have finished with everything, just click OK.
Step 6 - Configure your Ozeki service
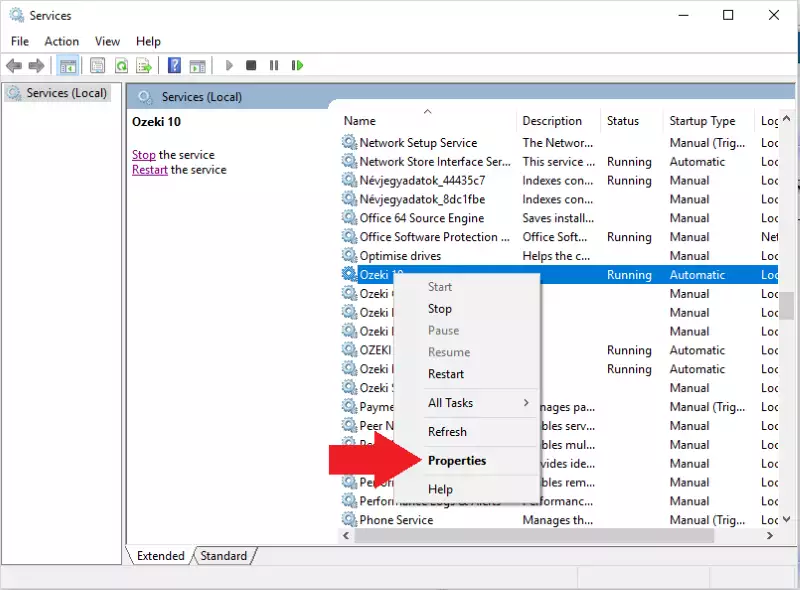
The Ozeki service runs in the background when you use Ozeki SMS Gateway. It is essential to allow Ozeki 10 to run files with the Application Starter User. Configure this service by selecting 'Control Panel' from your Windows Start menu and reaching 'Administrative Tools/Services'. Find 'Ozeki 10' on the list, right-click, and select 'Properties' (Figure 8).
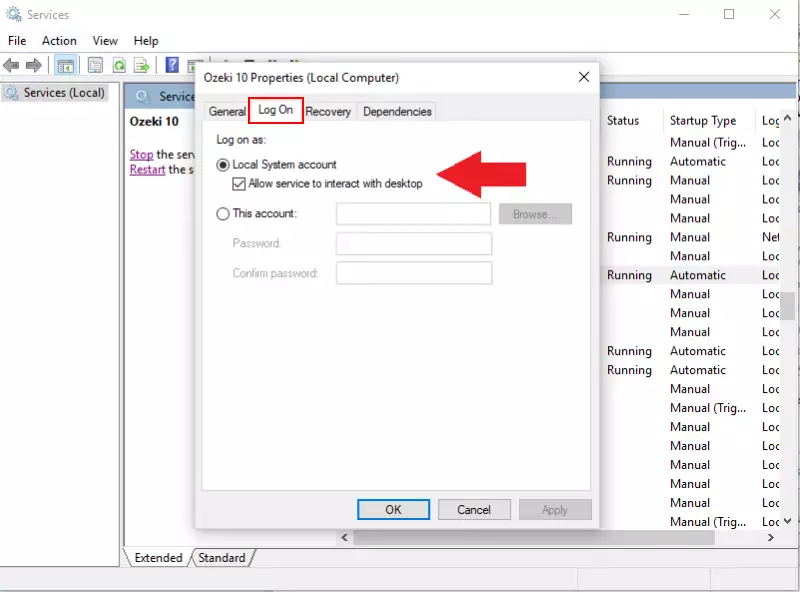
On the new window, called 'Ozeki 10 Properties', please select the 'Log On' tab page and tick the 'Allow service to interact with desktop' checkbox (Figure 9).
From now on, Ozeki SMS Gateway's Application Starter User will be able to start any process or application if you provide the proper path to the file. The file on the chosen path will start in case an SMS message is received.